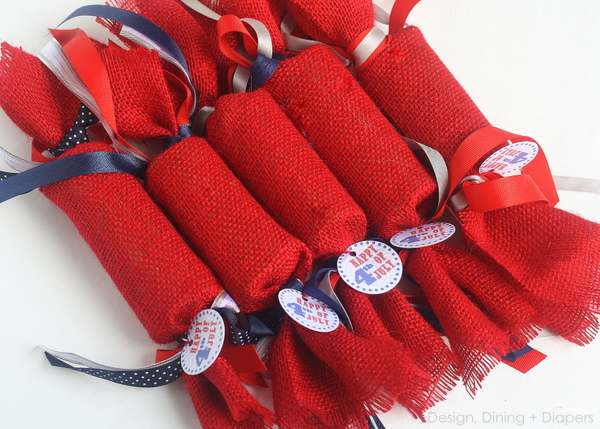
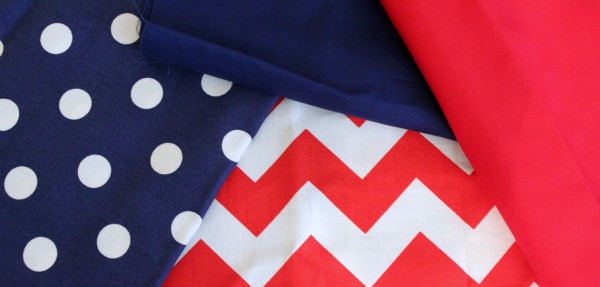
{Valentine’s Day Bunting}

{Valentine’s Day Bunting}

I’ll be the first to admit that I have a bit of an obsession with anything involving burlap.  I love how simple it looks, but also that it can make a big statement when decorating and crafting too.  I think one of the best craft store shopping trips I ever made was the day that I went to Hobby Lobby when they got in a huge shipment of burlap.  They had just about every color of the rainbow!  I didn’t go too crazy, but I did buy a few yards of colors that I thought I’d use throughout the year.  Of course I had to get some red…so many holidays incorporate it after all!

I decided to break it out to make some simple Valentine’s Day bunting for our fireplace {it was looking a little too bare after the Christmas garland came down this year}.

Valentine's Day Bunting

To make Valentine’s Day Bunting, you’ll need:

1/4 yard tan burlap

1/4 yard red burlap

hot glue gun/glue sticks

red & white baker’s twine

red raffia

materials

Now, I’m completely estimating on the cuts for the burlap.  I had about 2 yards of each color already on hand.  I’m guessing I used about 1/4 yard of each, maybe even less.

To start, I simply cut four rectangles of the tan burlap.  I believe they were 10 x 8 inches.  I also pulled a few strands off of each side to make them fray.

banner pieces

I then cut out the x’s and hearts {for my o’s} out of the red burlap.  I didn’t trace or stencil anything.  I just eyeballed it and made adjustments as I cut if I thought it necessary.  To add a bit of dimension I cut a smaller heart out of the tan burlap as well.

cut pieces

See, nothing about this is perfect, but that’s the beauty of burlap.  I don’t think it’s supposed to be perfect!

To assemble the bunting, I hot glued the x’s and hearts onto each rectangle and hot glued each rectangle on top of a strand of red & white baker’s twine.  I tied off each end to my wrapped beer bottle decor with freshly added  red flower stems and a few Valentine wooden words from the Target $ Spot.  To complete the bunting, I tied a few strands of red raffia between the x’s and hearts.

Valentine's Day Bunting 2

Simple, x’s and hearts to get the family in a Valentine’s Day kinda mood!

Happy Valentine’s Day everyone!

wtyfgh-signature

Linkin’ up here!

About Meredith Hazel

Meredith is a stay at home mom and has been blogging since 2012. She started Wait 'Til Your Father Gets Home as a creative outlet in between nap times for her little one. Wait 'Til Your Father gets home is a combination of crafting tutorials, DIY projects, recipes and, sharing some of life's journey along the way.

{Burlap & Heart Valentine Wreath}

{Burlap & Heart Valentine Wreath}

All the Christmas decor has finally been put away in the attic until next December.  Since I cannot bear the thought of a bare front door, of course I got busy soon after the Christmas wreath came down making a new one.  With Valentine’s Day right around the corner, I broke out the red burlap and created this beauty…

burlap heart valentine wreath

To Make a Burlap & Heart Valentine Wreath, you’ll need:

foam wreath form

2 rolls of red burlap {found at Hobby Lobby}

floral picks

heart decor {actually a candle/table wreath from Target’s $ Spot}

hot glue gun/glue sticks

materials

To start, I wrapped the entire wreath form in the red burlap and secured each end with a floral pin.

wrap wreath

Easy peasy.

Once the wreath was wrapped {and the green foam was no longer visible}, I began to pin and bubble the remainder of the burlap roll around the front side of the wreath.  Once you get started, you’ll figure out how you want the bubbles to lay and it will be full in a matter of minutes.

bubble pin

At this point I realized that the heart wreath I purchased at the Target $ Spot wasn’t actually one of those garlands you could wrap around an actual wreath.  Instead it was one of those tabletop wreaths that you would set at the base of a large pillar candle or glass vase.  So, I decided to just snip off the hearts with some wire cutters and hot glue them around the wreath itself.  Hey, for $1, I wasn’t too bothered by my mistake!

And now my front door is just as ready for Valentine’s Day as I am!

burlap heart wreath

{P.S. As soon as the weather is a bit nicer hubby will be helping me get the front door painted from our current blah color to a beautiful red.  Hopefully by the next time I post a new wreath, I’ll also have a pretty red front door to show you as well}!

wtyfgh-signature

Linkin’ up here!


About Meredith Hazel

Meredith is a stay at home mom and has been blogging since 2012. She started Wait 'Til Your Father Gets Home as a creative outlet in between nap times for her little one. Wait 'Til Your Father gets home is a combination of crafting tutorials, DIY projects, recipes and, sharing some of life's journey along the way.

{No-Sew Burlap Table Runner}

{No-Sew Burlap Table Runner}

I went to Hobby Lobby yesterday, hoping to take advantage of the 80% off Thanksgiving and Fall decor sale they have right now.  I was super bummed to see that the one shelf that housed these items hardly had anything left!  Oh well, late to the party, I suppose.

I decided to head home (empty handed, yes…empty handed from a craft store trip….shocking, right?!) and looked through my crafting supplies.  There had to be a way to make some kind of table runner without my sewing machine (it’s still getting fixed).

I gathered the following supplies, plus my trusty glue gun, and got to work.

I don’t have exact measurements for the burlap and linen material I used as a liner.  I simply cut them until I felt they fit right with my table size!  I like to make table runners that don’t hang over the edges as a certain 16 month old would immediately try to pull it down.  All of the other supplies were leftover from my Fall Mantel and my Ruffled Burlap Wreath, both of which are still on display (until this weekend when I plan to start decorating for Christmas)!

I used a few dabs of hot glue on the corners and sides of the linen fabric to line the back of the burlap.  I figured that would eliminate some of the mess that comes with burlap and create a smoother surface on the bottom side.  The linen didn’t go all the way to the edges of the burlap as I wanted to pull a few strands off from each side to make the burlap fray.

Once the linen fabric was secured, I pulled a few strands of the burlap off of each side to create a frayed look.  I then added some Fall leaves and cute felt pumpkins (both originally found at Hobby Lobby) in two of the corners to give the table runner some color.  I used my hot glue gun to attach everything!

This is one of the easiest projects I’ve ever made!  The whole table runner took maybe 10 minutes after my glue gun heated up!  I love the simplicity of it and know it will be the perfect addition to our table at Thanksgiving dinner this Thursday!

Have a Happy & Blessed Thanksgiving tomorrow!  If you are looking to link up to Keep Calm & Link Up tomorrow evening, we will be partying, just a bit later than usual.  Stop by at 9 PM EST to link up this week!

I’ll be linking up at these fantastic parties.

About Meredith Hazel

Meredith is a stay at home mom and has been blogging since 2012. She started Wait 'Til Your Father Gets Home as a creative outlet in between nap times for her little one. Wait 'Til Your Father gets home is a combination of crafting tutorials, DIY projects, recipes and, sharing some of life's journey along the way.

{Ruffled Burlap Wreath Guest Post}

Happy Saturday everyone!

Just a quick note to let you know that I’ll be sharing my Ruffled Burlap Wreath over at Pocket Full of Pink today!

It screams Fall if you ask me!

Thanks again to Karen for having me over to her place today!

About Meredith Hazel

Meredith is a stay at home mom and has been blogging since 2012. She started Wait 'Til Your Father Gets Home as a creative outlet in between nap times for her little one. Wait 'Til Your Father gets home is a combination of crafting tutorials, DIY projects, recipes and, sharing some of life's journey along the way.

{Burlap Fall Banner & Mantel Reveal}

{Burlap Fall Banner & Mantel Reveal}

As mentioned before, burlap is the bomb!  I used it to make a banner for my son’s first birthday party, as a background for my Menu Planner Board, and most recently in my Ruffled Burlap Wreath for the Fall.

I knew I wanted to incorporate it into a fresh new banner for a Fall mantel I had in mind.  To make the banner you’ll need…

Burlap Fall Banner

4 pieces of burlap cut to the same size for F A L L

2 pieces of burlap cut to the same size for Fall embellishments

jute twine

Fall embellishments (leaves, a Fall stem, etc…)

black sharpie

glue gun/hot glue

surface to place under the burlap when you write

Now, if I had a fancy shmancy Silhouette I could have made a super cute banner, maybe using vinyl and some chalkboard paper, but me + Silhouette = no go (for now).  Luckily I’ve got some really nice, teacher handwriting.

I honestly just free-handed the letters, trying to make them look as centered and as even as possible.  I think I did a pretty good job considering.

For the end pieces, I hot glued a couple of leaves that I had in my Fall storage bin and a little wooden pumpkin to each piece of burlap.  I also pulled out a few strands of burlap on each piece, so they’d look a little tattered.

To attach the banner pieces to the jute twine, I didn’t do any measuring.  Who needs that extra step anyway?

I simply laid out the banner in front of my mantel, spaced things out how I felt I wanted them, and hot glued each burlap piece to the twine.  I wrapped the top of the burlap a bit so that it stuck well.

Once I had the banner hung (I just wrapped each end around the item on the mantel that was the furthest on each side), I then added leaves and pieces of a Fall floral stem where I thought it looked good.

Soon I had this beautiful

Burlap Fall Banner & Mantel

I LOVE the simplicity of it.

Those birds were actually from hubby’s grandparent’s house.  We get tons of compliments on them all the time.  I think they’re pretty cool!

I also added my jute twine wrapped beer bottles with some Fall stems I found in my storage bin, a $1.50 grapevine pumpkin from Target that I fancied up with an orange ribbon, our wine cork collection {we’ve been collecting for four years now}, and a vase filled with wine corks and a few Fall stems as well.  In fact, the only item I actually bought was the little grapevine pumpkin from Target.  So this mantel was totally refreshed by only spending $1.50…SCORE!

Are you on the burlap train with me?  Or are you over it?

What have you done with your mantel this Fall season?

Leave a comment or two, I’d love to hear your ideas!

I’ll be partying here all week!

Show & Tell Wednesday @ SNAP!


Photobucket

Related Posts Plugin for WordPress, Blogger...

About Meredith Hazel

Meredith is a stay at home mom and has been blogging since 2012. She started Wait 'Til Your Father Gets Home as a creative outlet in between nap times for her little one. Wait 'Til Your Father gets home is a combination of crafting tutorials, DIY projects, recipes and, sharing some of life's journey along the way.