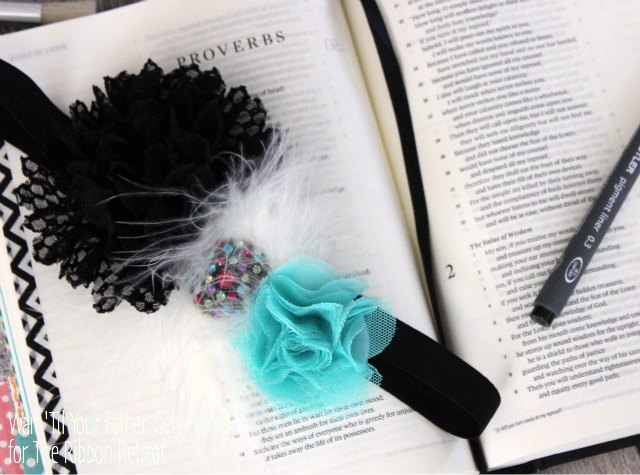
{Mosaic Tile Stepping Stone}

{Mosaic Tile Stepping Stone}

I had a bit of a predicament the past couple of weeks.  You see, I wanted to share my Mother’s Day gift ideas with all of you pre-Mother’s Day, but I didn’t want the mothers in my life {Jackson’s grandmothers} to find out what we had made for them this year.  So, I’m sharing them now, a week late, but pin them for next year!  Trust me, you’ll be glad you did!

For Jackson’s grandmother that lives nearby and loves to garden, we opted for creating a

Mosaic Tile Stepping Stone

Mosaic Tile Stepping Stone @ Wait Til Your Father Gets Home, perfect gift for Mother's Day or to mark a special occasion #steppingstone #gardenstone #mosaictiles #handprints #gifts #kids #garden


stepping stone @ WTYFGH

To make your own, you’ll need:

cement mix

stone mold

painters stick for mixing

bucket

wooden skewer for writing

mosaic tiles

{most craft stores sell complete kits as well, if you’d rather go for that option}

Mosaic Tile Stepping Stone @ Wait Til Your Father Gets Home, perfect gift for Mother's Day or to mark a special occasion #steppingstone #gardenstone #mosaictiles #handprints #gifts #kids #garden

I worked on this project outside as I didn’t want to risk getting cement mixture or dust all over my kitchen!

STEP 1

Follow the directions that go along with the particular cement mixture you purchased.  Mine called for three cups of water.  I emptied both the contents of the cement bag and the water into a cheap bucket from the dollar store and stirred until mixed thoroughly with the paint stick.

Mosaic Tile Stepping Stone @ Wait Til Your Father Gets Home, perfect gift for Mother's Day or to mark a special occasion #steppingstone #gardenstone #mosaictiles #handprints #gifts #kids #garden

STEP 2

Once the mixture was mixed well, I poured it into the mold and smoothed it out with the paint stick.  You can also grab opposite ends of the mold and shake lightly, back and forth, to get it to lay flat.

Mosaic Tile Stepping Stone @ Wait Til Your Father Gets Home, perfect gift for Mother's Day or to mark a special occasion #steppingstone #gardenstone #mosaictiles #handprints #gifts #kids #garden

STEP 3

Immediately after getting the mixture as flat as possible in your mold, you’ll want to start placing the mosaic tiles in your desired pattern.

Working with cement and a 22 month old is not an easy task, therefore there are no real pictures of him working on this project.  I can assure you, he did a lot of the work after this point, I just had to make sure to supervise him very closely.

Mosaic Tile Stepping Stone @ Wait Til Your Father Gets Home, perfect gift for Mother's Day or to mark a special occasion #steppingstone #gardenstone #mosaictiles #handprints #gifts #kids #garden

STEP 4

After about 20 minutes {which was about the time it took for us to place all the tiles onto the stone}, the cement was set enough to add some writing.  I wanted to put both of Jackson’s hand prints in the stone, but after getting just one little hand in there {and a major meltdown}, I decided that one was good enough for me.  He seriously loves to play and get dirty, but for some reason his hands in the cement did not fly!  I also added his name and the year, so Grandma would always remember when he made it for her.

Mosaic Tile Stepping Stone @ Wait Til Your Father Gets Home, perfect gift for Mother's Day or to mark a special occasion #steppingstone #gardenstone #mosaictiles #handprints #gifts #kids #garden

I want one for our garden now too!  Maybe I can convince him to put his little hand in some cement for me just one more time!

I’ll be linking up at these parties!

wtyfgh-signature

About Meredith Hazel

Meredith is a stay at home mom and has been blogging since 2012. She started Wait 'Til Your Father Gets Home as a creative outlet in between nap times for her little one. Wait 'Til Your Father gets home is a combination of crafting tutorials, DIY projects, recipes and, sharing some of life's journey along the way.

{Wine Cork Garden Markers}

{Wine Cork Garden Markers}

I’ve got a super easy and super fast craft for all of you today.  I emphasize the super fast part as I’m sharing this craft as part of 30 Minute Crafts & The Country Chic Cottage‘s

CRAFT LIGHTNING WEEK!


I noticed last year when planting my garden that my herbs just didn’t seem to do too well outside.  Most of them got overtaken by some pretty crazy zuchinni {that stuff seriously grows like a weed} or they died because I think it was just a bit too hot for them.

This year, I decided on a few favorite herbs, bought myself a cute planter, and decided that they would be mostly indoor herbs.  I put them outside when the sun is shining to give them some natural light, otherwise, they stay in my kitchen.  Once they start really growing {I planted them as seeds}, I won’t have to leave the kitchen while cooking to add some fresh herbs to my meals.

I wanted to make sure to have some cute plant markers, so I knew which was which and came up with this little idea.

Wine Cork Garden Markers

Easy Wine Cork Garden Markers @ Wait Til Your Father Gets Home; makes a great gift #garden #winecorks #herbs #planters

To make some for your herbs or your outdoor garden, you’ll need the following supplies:

wine corks

wooden skewers

black sharpie

polyurethane sealer {if using outdoors}

Easy Wine Cork Garden Markers @ Wait Til Your Father Gets Home; makes a great gift #garden #winecorks #herbs #planters

Now, all you have to do is write out each herb, veggie, or fruit onto individual wine corks.  Poke the pointy end of the skewer into the bottom of the cork and place the skewer in the correct planter.

Easy Wine Cork Garden Markers @ Wait Til Your Father Gets Home; makes a great gift #garden #winecorks #herbs #planters

Now, that’s what I call a Craft Lightning project!

Easy Wine Cork Garden Markers @ Wait Til Your Father Gets Home; makes a great gift #garden #winecorks #herbs #planters

If you’re using these outside, make sure to apply a coat of polyurethane sealer to keep the marker from fading away.

I’ll be linking up at these fabulous parties!

wtyfgh-signature

About Meredith Hazel

Meredith is a stay at home mom and has been blogging since 2012. She started Wait 'Til Your Father Gets Home as a creative outlet in between nap times for her little one. Wait 'Til Your Father gets home is a combination of crafting tutorials, DIY projects, recipes and, sharing some of life's journey along the way.

{No-Sew Fabric Key Fobs}

{No-Sew Fabric Key Fobs}

You might recall, last week I shared one of the gifts that I made for my SNAP! roomies this year.

Handmade Business Card Holders

Business Card Holders1

To accompany them, I also made each of the girls a super easy,

No-Sew Fabric Key Fob

No-Sew Fabric Key Fobs @ Wait Til Your Father Gets Home make the perfect gift! #nosew #keyfob #keychain

To make your own, you’ll need the following supplies:

2 fabric pieces cut 10″ x 2 1/2″

key fob hardware {found mine on Amazon}

hem tape {I used 5/8″ roll}

pliers

iron

No-Sew Fabric Key Fobs @ Wait Til Your Father Gets Home make the perfect gift! #nosew #keyfob #keychain

Now, you may not be sewing anything for this project, but you sure will be doing your fair share of ironing.  So get ready!

Cut the two fabric pieces you’re using per key fob to 10″ x 2 1/2″.  I chose to use the same fabrics that I used when making my handmade business card holders.

No-Sew Fabric Key Fobs @ Wait Til Your Father Gets Home make the perfect gift! #nosew #keyfob #keychain

You’ll start with one piece and begin to fold and iron, fold and iron.

Place each fabric horizontally in front of you, wrong side facing up.  Fold and iron a 1″ hem from the bottom.

No-Sew Fabric Key Fobs @ Wait Til Your Father Gets Home make the perfect gift! #nosew #keyfob #keychain

Also fold about 1/2″ hem from the top.  Once you’ve got a nice, crisp fold, fold the bottom once more, up to line up with the top.

No-Sew Fabric Key Fobs @ Wait Til Your Father Gets Home make the perfect gift! #nosew #keyfob #keychain

Do the same for the other piece of fabric you’ll be using.

Once both pieces are folded and are the same size, you’re ready to use the hem tape to attach them together.

No-Sew Fabric Key Fobs @ Wait Til Your Father Gets Home make the perfect gift! #nosew #keyfob #keychain

Cut the hem tape to the length of one of the pieces of fabric, iron over it, following package directions, and let cool for a minute or two before removing the paper backing.  Once you’ve removed the paper backing, line up the other piece of fabric on top of the hem tape and iron once more.  You will do this two more times, as each piece of fabric needs to be hem-taped to itself as well.  Once finished, you should not be able to open up any part of the fabric strip.

No-Sew Fabric Key Fobs @ Wait Til Your Father Gets Home make the perfect gift! #nosew #keyfob #keychain

Fold the fabric in half, and iron.  Attach the key fob hardware using a pair of pliers and also attach the key ring.

Now you’ve got a beautiful new key fob to use for yourself or to give as a fun gift!

No-Sew Fabric Key Fobs @ Wait Til Your Father Gets Home make the perfect gift! #nosew #keyfob #keychain

I’ll be linking up at these fabulous parties!

wtyfgh-signature

About Meredith Hazel

Meredith is a stay at home mom and has been blogging since 2012. She started Wait 'Til Your Father Gets Home as a creative outlet in between nap times for her little one. Wait 'Til Your Father gets home is a combination of crafting tutorials, DIY projects, recipes and, sharing some of life's journey along the way.

{Business Card Holders}

{Business Card Holders}

When I went to SNAP! a few weeks ago, I knew I’d need some pretty awesome business cards.  You see, when you meet another blogger at a conference, you usually say something like this…

“Hi, I’m Meredith from Wait ‘Til Your Father Gets Home”

and then immediately exchange business cards with the other blogger.

Just look at some of the cards I accumulated this year at SNAP!…

business cards

Crazy, right?!

Now, how to keep track of all those cards, plus my own stack to hand out?  I had the perfect solution after doing some browsing of the blogosphere.  My sweet friend, Lindsay had a pattern for some super simple, sewn business card holders, and I knew I could easily put my own spin on her awesome version for myself and my SNAP! roomies using these pretty fabrics.

fabrics

Materials Needed

2 Fabric Pieces cut to 5 1/2″ x 4 1/2″
{One liner, one outside}
2 Fabric Pieces cut to 2 1/2″ x 4 1/2″
{pockets}
1 Piece Fusible Interfacing cut to 5 1/2″ x 4 1/2″
thread
coordinating button
velcro
pieces

Step 1

On both of the 2 1/2 x 4 1/2″ pieces, fold and iron a double 1/4″ hem.  Sew along the folded edge {for some reason, I forgot to actually sew this on this particular business card holder, so ignore my picture and the fact that each piece is not sewn along the hem}.

hem pockets

Step 2

Line up your velcro pieces, pin, and sew in place.

velcro

Step 3: Assembly

Picture 1: Pin pockets to inside piece {the hem of each pocket should be towards the middle}.

Picture 2: After ironing the fusible interfacing to the wrong side of the outside piece, pin it to the inside piece with the pockets, right sides facing each other.

Picture 3: Sew around the entire piece, with a 1/4″ seam allowance.  Leave a space on one side to flip right side out, but make sure to back stitch as you don’t want your sewing to come undone.  Clip the corners at a 45 degree angle before flipping.

Picture 4: Iron as flat as possible and pin the space you left un-sewn.  Sew a topstitch around the entire business card holder with a 1/4″ seam allowance.

assembly

Step 4

Fold the business card holder in half and run your iron over it once again.  In the crease, sew a straight line.  This makes folding the business card holder a lot easier as you’re using it.

finished

Step 5

Carefully sew a cute button onto the front of one side of the business card holder.  Make sure not to sew your pocket shut!

Handmade Business Card Holders @ Wait Til Your Father Gets Home, perfect to take to a blog conference or to keep in your purse #businesscards #handmade #businesscardholder

And now you’re ready to hand out business cards in a snap {or in my case, at SNAP!}

Handmade Business Card Holders @ Wait Til Your Father Gets Home, perfect to take to a blog conference or to keep in your purse #businesscards #handmade #businesscardholder

Those are all of the cute holders I ended up giving my roomies as gifts upon arriving at the conference!

I think my favorite is the teal and pink chevron.  Which one is yours?

Handmade Business Card Holders @ Wait Til Your Father Gets Home, perfect to take to a blog conference or to keep in your purse #businesscards #handmade #businesscardholder

I’ll be linking up at these great parties!

wtyfgh-signature

About Meredith Hazel

Meredith is a stay at home mom and has been blogging since 2012. She started Wait 'Til Your Father Gets Home as a creative outlet in between nap times for her little one. Wait 'Til Your Father gets home is a combination of crafting tutorials, DIY projects, recipes and, sharing some of life's journey along the way.

{Easy No-Sew Fleece Blanket}

{Easy No-Sew Fleece Blanket}

Every time I walk through the fabric department at Hobby Lobby, the fleece seems to call my name.  Since it’s always on sale, I seem to always tell myself to just get some next time.  I finally gave in last week however, and purchased some Cars fleece to make my little guy one of the easiest blankets ever.  I’m sure you’ve either made one yourself or seen one before.

Easy No-Sew Fleece Blanket @ Wait Til Your Father Gets Home Makes the perfect gift for little ones or family members! #blanket #nosew #fleece

To make a No-Sew Fleece Blanket, you’ll need…

2 yards fleece {choose two colors, 1 yd each}

sharp fabric scissors

tape measure

flat surface

*1 yard pieces make a great size blanket for a toddler or young child.  You may want to consider 1 1/2 for adult sized blankets.

Easy No-Sew Fleece Blanket @ Wait Til Your Father Gets Home Makes the perfect gift for little ones or family members! #blanket #nosew #fleece

To start, lay out both pieces of fleece flat and trim any selvage or raw ends off.

Place the two pieces on top of each other, right sides facing out and make sure all edges line up.

Cut a 3″ square at each corner.

Easy No-Sew Fleece Blanket @ Wait Til Your Father Gets Home Makes the perfect gift for little ones or family members! #blanket #nosew #fleece

Using your tape measure, make fringe cuts that are 3″ long and 1 1/2″ wide.  I worked on one side at a time, first cutting the entire side, then tying a double knot between both layers.

Easy No-Sew Fleece Blanket @ Wait Til Your Father Gets Home Makes the perfect gift for little ones or family members! #blanket #nosew #fleece

The beauty of this kind of blanket is that your cuts do not have to be absolutely perfect.  Granted, they can’t be too out of control either, but there is some room for error here.  After cutting and tying one side at a time, you’ll soon have a warm, cozy, blanket!

Easy No-Sew Fleece Blanket @ Wait Til Your Father Gets Home Makes the perfect gift for little ones or family members! #blanket #nosew #fleece

I made the blanket for my little guy while he took his nap one day last week.  It was one of those rare days that his nap was extra long, and I was so anxious to see his face once I gave it to him.

Easy No-Sew Fleece Blanket @ Wait Til Your Father Gets Home Makes the perfect gift for little ones or family members! #blanket #nosew #fleece

Let’s just say it was a BIG hit!  He loves to sleep with it now, almost as much as he loves those two bears {his “buddies”} in the picture.

Have you ever made a No-Sew Fleece Blanket before?

wtyfgh-signature

I’ll be linking up at these parties.

Related Posts Plugin for WordPress, Blogger...

About Meredith Hazel

Meredith is a stay at home mom and has been blogging since 2012. She started Wait 'Til Your Father Gets Home as a creative outlet in between nap times for her little one. Wait 'Til Your Father gets home is a combination of crafting tutorials, DIY projects, recipes and, sharing some of life's journey along the way.