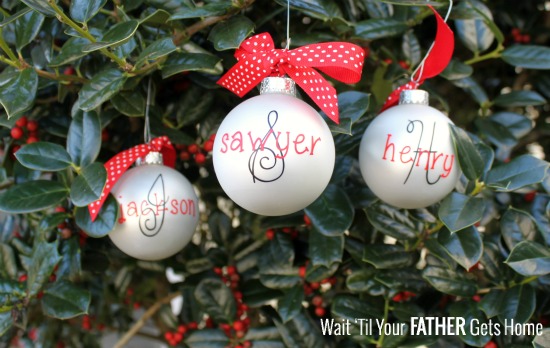
{Mosaic Tile Stepping Stone}

{Mosaic Tile Stepping Stone}

I had a bit of a predicament the past couple of weeks.  You see, I wanted to share my Mother’s Day gift ideas with all of you pre-Mother’s Day, but I didn’t want the mothers in my life {Jackson’s grandmothers} to find out what we had made for them this year.  So, I’m sharing them now, a week late, but pin them for next year!  Trust me, you’ll be glad you did!

For Jackson’s grandmother that lives nearby and loves to garden, we opted for creating a

Mosaic Tile Stepping Stone

Mosaic Tile Stepping Stone @ Wait Til Your Father Gets Home, perfect gift for Mother's Day or to mark a special occasion #steppingstone #gardenstone #mosaictiles #handprints #gifts #kids #garden


stepping stone @ WTYFGH

To make your own, you’ll need:

cement mix

stone mold

painters stick for mixing

bucket

wooden skewer for writing

mosaic tiles

{most craft stores sell complete kits as well, if you’d rather go for that option}

Mosaic Tile Stepping Stone @ Wait Til Your Father Gets Home, perfect gift for Mother's Day or to mark a special occasion #steppingstone #gardenstone #mosaictiles #handprints #gifts #kids #garden

I worked on this project outside as I didn’t want to risk getting cement mixture or dust all over my kitchen!

STEP 1

Follow the directions that go along with the particular cement mixture you purchased.  Mine called for three cups of water.  I emptied both the contents of the cement bag and the water into a cheap bucket from the dollar store and stirred until mixed thoroughly with the paint stick.

Mosaic Tile Stepping Stone @ Wait Til Your Father Gets Home, perfect gift for Mother's Day or to mark a special occasion #steppingstone #gardenstone #mosaictiles #handprints #gifts #kids #garden

STEP 2

Once the mixture was mixed well, I poured it into the mold and smoothed it out with the paint stick.  You can also grab opposite ends of the mold and shake lightly, back and forth, to get it to lay flat.

Mosaic Tile Stepping Stone @ Wait Til Your Father Gets Home, perfect gift for Mother's Day or to mark a special occasion #steppingstone #gardenstone #mosaictiles #handprints #gifts #kids #garden

STEP 3

Immediately after getting the mixture as flat as possible in your mold, you’ll want to start placing the mosaic tiles in your desired pattern.

Working with cement and a 22 month old is not an easy task, therefore there are no real pictures of him working on this project.  I can assure you, he did a lot of the work after this point, I just had to make sure to supervise him very closely.

Mosaic Tile Stepping Stone @ Wait Til Your Father Gets Home, perfect gift for Mother's Day or to mark a special occasion #steppingstone #gardenstone #mosaictiles #handprints #gifts #kids #garden

STEP 4

After about 20 minutes {which was about the time it took for us to place all the tiles onto the stone}, the cement was set enough to add some writing.  I wanted to put both of Jackson’s hand prints in the stone, but after getting just one little hand in there {and a major meltdown}, I decided that one was good enough for me.  He seriously loves to play and get dirty, but for some reason his hands in the cement did not fly!  I also added his name and the year, so Grandma would always remember when he made it for her.

Mosaic Tile Stepping Stone @ Wait Til Your Father Gets Home, perfect gift for Mother's Day or to mark a special occasion #steppingstone #gardenstone #mosaictiles #handprints #gifts #kids #garden

I want one for our garden now too!  Maybe I can convince him to put his little hand in some cement for me just one more time!

I’ll be linking up at these parties!

wtyfgh-signature

About Meredith Hazel

Meredith is a stay at home mom and has been blogging since 2012. She started Wait 'Til Your Father Gets Home as a creative outlet in between nap times for her little one. Wait 'Til Your Father gets home is a combination of crafting tutorials, DIY projects, recipes and, sharing some of life's journey along the way.

{Mother’s Day Gift Ideas & Giveaway}

I love making handmade gifts, especially around Mother’s Day for all the moms in my life.  Now that I’ve got a little guy of my own, I like to help him make gifts for his grandmas too.  To get some inspiration, I’ve rounded up some favorite Mother’s Day gift ideas that I’ve found!

printablepreview

Mother’s Day Printable Quote from Becoming Martha

Martha13_thumb[6]

Fabric Covered Stenciled Journals from The Girl Creative

Terra-Cotta-Tower1.www_.chasethestar1

Terra Cotta Pot Tower from Chase the Star

flower frame

Flower Adorned Mother’s Day Frame from Create.Craft.Love

flowerhands

Hands-on Mother’s Day Cards from One Artsy Mama

Mothers-Day-Chalkboard-Vase 01

Mother’s Day Chalkboard Vase from Simply Designing

DIY Tiered Planters from The Country Chic Cottage-009

DIY Tiered Planters from The Country Chic Cottage

mothersdaysubwayart_preview

Mother’s Day Subway Art from I Should Be Mopping the Floor

Mothers-Day-Planter-Tray-12_thumb

Planter & Serving Tray from Alderberry Hill

Mothers-Day-Gift-For-Grandmas

Brag Bag for Proud Grandma’s from No Time for Flash Cards

And I still love the gift that we made for Jackson’s grandma’s last year, these super cute Fingerprint Necklaces…

fingerprint necklaces

Fingerprint Necklaces from Wait ’til Your Father Gets Home

Now, in case you don’t want to just go the “handmade route”, I’m teaming up with some fabulous bloggers and Cricut to giveaway some absolutely AMAZING prizes to one lucky reader AND their mother!  That’s right ladies {and I’m sure some gents}…

HUGE Giveaway...winner gets 2 Cricut Expression 2, and their choice of either 2 Kitchen Aid Mixers or 2 Canon Rebel T3's (one prize pack for you and one for your mama) Would make an awesome Mother's Day gift!!

The Winner Gets

A Cricut Expression 2 ($249 value) AND their CHOICE of a Canon Rebel T3 or a Kitchen Aid Artisan 5 Quart mixer AND, the same prize package for their mom!  WOW!!

The Contest Runs…

Sunday April 28 through Thursday May 9th (the Thursday before Mother’s Day)

Enter below using Rafflecopter {and GOOD LUCK}!  I’d love a reader of Wait ’til Your Father Gets Home to win!

a Rafflecopter giveaway

wtyfgh-signature

The participating bloggers were not compensated for this post.

No purchase is necessary to enter. Void where prohibited by law. The odds of winning are based on the number of entries received.** This promotion is no way sponsored, endorsed or administered by, or associated with, Facebook.** To qualify to win, you must fill out the Entry. See Rafflecopter for complete rules. This giveaway is compliant with Facebook Promotions Guidelines. Must be aged 18+ to enter & win. Valid only in the United States. Void where prohibited by state or national law.


About Meredith Hazel

Meredith is a stay at home mom and has been blogging since 2012. She started Wait 'Til Your Father Gets Home as a creative outlet in between nap times for her little one. Wait 'Til Your Father gets home is a combination of crafting tutorials, DIY projects, recipes and, sharing some of life's journey along the way.

{Easy No-Sew Fleece Blanket}

{Easy No-Sew Fleece Blanket}

Every time I walk through the fabric department at Hobby Lobby, the fleece seems to call my name.  Since it’s always on sale, I seem to always tell myself to just get some next time.  I finally gave in last week however, and purchased some Cars fleece to make my little guy one of the easiest blankets ever.  I’m sure you’ve either made one yourself or seen one before.

Easy No-Sew Fleece Blanket @ Wait Til Your Father Gets Home Makes the perfect gift for little ones or family members! #blanket #nosew #fleece

To make a No-Sew Fleece Blanket, you’ll need…

2 yards fleece {choose two colors, 1 yd each}

sharp fabric scissors

tape measure

flat surface

*1 yard pieces make a great size blanket for a toddler or young child.  You may want to consider 1 1/2 for adult sized blankets.

Easy No-Sew Fleece Blanket @ Wait Til Your Father Gets Home Makes the perfect gift for little ones or family members! #blanket #nosew #fleece

To start, lay out both pieces of fleece flat and trim any selvage or raw ends off.

Place the two pieces on top of each other, right sides facing out and make sure all edges line up.

Cut a 3″ square at each corner.

Easy No-Sew Fleece Blanket @ Wait Til Your Father Gets Home Makes the perfect gift for little ones or family members! #blanket #nosew #fleece

Using your tape measure, make fringe cuts that are 3″ long and 1 1/2″ wide.  I worked on one side at a time, first cutting the entire side, then tying a double knot between both layers.

Easy No-Sew Fleece Blanket @ Wait Til Your Father Gets Home Makes the perfect gift for little ones or family members! #blanket #nosew #fleece

The beauty of this kind of blanket is that your cuts do not have to be absolutely perfect.  Granted, they can’t be too out of control either, but there is some room for error here.  After cutting and tying one side at a time, you’ll soon have a warm, cozy, blanket!

Easy No-Sew Fleece Blanket @ Wait Til Your Father Gets Home Makes the perfect gift for little ones or family members! #blanket #nosew #fleece

I made the blanket for my little guy while he took his nap one day last week.  It was one of those rare days that his nap was extra long, and I was so anxious to see his face once I gave it to him.

Easy No-Sew Fleece Blanket @ Wait Til Your Father Gets Home Makes the perfect gift for little ones or family members! #blanket #nosew #fleece

Let’s just say it was a BIG hit!  He loves to sleep with it now, almost as much as he loves those two bears {his “buddies”} in the picture.

Have you ever made a No-Sew Fleece Blanket before?

wtyfgh-signature

I’ll be linking up at these parties.

About Meredith Hazel

Meredith is a stay at home mom and has been blogging since 2012. She started Wait 'Til Your Father Gets Home as a creative outlet in between nap times for her little one. Wait 'Til Your Father gets home is a combination of crafting tutorials, DIY projects, recipes and, sharing some of life's journey along the way.

{Mason Jar Sewing Kits}

{Mason Jar Sewing Kits}

I absolutely adore mason jars, don’t you?!  There’s just a simplicity to them that makes me want to use them everywhere in my home.  One way that I love to use them is to store sewing items in my craft room room that will one day be my nice, neat, organized craft room.  I’d show you a picture, but you’d probably spit out whatever you’re drinking on your computer and get mad at me, so I’ll just save that embarrassment, reveal until I’ve actually gotten my butt in gear to get the room set up.

Mason Jar Sewing Kits @ Wait Til Your Father Gets Home Makes a great gift for anyone that loves to sew! #sewing #masonjar #gift

To make Mason Jar Sewing Kits, you’ll need:

a few small mason jars

pretty fabric {you don’t need much, raid your fabric stash}

fiber fill

hot glue/glue gun

scrapbook paper that matches your fabric scraps

pen or pencil

straight pins & other sewing notions to store in your sewing kits

Mason Jar Sewing Kits @ Wait Til Your Father Gets Home Makes a great gift for anyone that loves to sew! #sewing #masonjar #gift

To get started, you’ll first want to trace the lid of the mason jar onto the wrong side of the scrapbook paper.  You’ll use these circles on the inside of each lid, just to give them a more finished look.

Mason Jar Sewing Kits @ Wait Til Your Father Gets Home Makes a great gift for anyone that loves to sew! #sewing #masonjar #gift

Once you’ve got those circles cut out, cut out a 4 x 4 or so piece of the fabric you’ll be using as well.  It doesn’t have to be perfect, as you’ll be trimming the excess fabric off in one of the last steps.

Mason Jar Sewing Kits @ Wait Til Your Father Gets Home Makes a great gift for anyone that loves to sew! #sewing #masonjar #gift

Next, you’ll assemble each lid of your sewing kits.

Mason Jar Sewing Kits @ Wait Til Your Father Gets Home Makes a great gift for anyone that loves to sew! #sewing #masonjar #gift

1. Lay the rim of the lid on a flat surface {top facing downward}.

2. Place a piece of fabric on top of the rim, wrong side facing up.

3. Place a small handful of fiber fill on top of the fabric.

4. Position the lid of the mason jar over the fiber fill.

5.  Push the lid, fiber fill, and fabric slightly through the mason jar rim.  It should pop out a bit so you’ll have an area to poke straight pins into.

6. Once you’ve gotten the lid pretty secure inside the rim, trim any excess fabric and use your hot glue gun to get the fabric to lay flat.

7.  Cover the inside of the lid with the scrapbook paper circle you cut out first to hide all the jagged fabric edges and hot glue.  {This step is optional, but I think it makes the project look more polished, especially when you need to remove the lid to get sewing items out of the jar.}

Mason Jar Sewing Kits @ Wait Til Your Father Gets Home Makes a great gift for anyone that loves to sew! #sewing #masonjar #gift

Anytime I’m using my sewing machine, these mason jar sewing kits are most definitely nearby.  They are the absolute BEST pincushions, and I love that I can see all the threads and other sewing items inside at a glance.  They make great gifts too for anyone that loves to sew paired with some pretty new fabric or a gift card to your local fabric store.

Mason Jar Sewing Kits @ Wait Til Your Father Gets Home Makes a great gift for anyone that loves to sew! #sewing #masonjar #gift

To see some of my other Mason Jar Crafts, you can take a peek at the following posts:

//The Giving Jar//Mod Podge Dyed Mason Jars//

//Spray Painted Mason Jar//Patriotic Twine & Bead Mason Jars//

What have you used a mason jar for lately?  I’d love to hear your ideas!

wtyfgh-signature

I’ll be linking up at these parties.

Green Crafts Showcase

About Meredith Hazel

Meredith is a stay at home mom and has been blogging since 2012. She started Wait 'Til Your Father Gets Home as a creative outlet in between nap times for her little one. Wait 'Til Your Father gets home is a combination of crafting tutorials, DIY projects, recipes and, sharing some of life's journey along the way.

{Easy Burp Cloths}

{Easy Burp Cloths}

You can say I’ve got baby on the brain {seeing as that I’m now 21 weeks pregnant}!

20weeks1

Say hello to sweet baby number two!  We aren’t finding out the gender until baby is born.  We did that with Jackson, and it was such a wonderful surprise…I highly recommend it!

Since I’m gearing up for another little one in the next few months, and I’ve got friends popping out babies left and right these days {must be something in the water}, I decided to spend last weekend making some easy burp cloths as a gift.

I’ve made a few different kinds of handmade burp cloths before, but wanted to try using a pre-folded cloth diaper instead this time around.  I received a set of three as a gift when I had Jackson, and they were my absolute favorites to use with him.  He was a spitter-upper and the cloth diapers were super absorbent.

easy burp cloths

To make Cloth Diaper Burp Cloths, you’ll need:

tri-fold cloth diapers {the best deal I could find was a 10 pack at Target for about $17}

cute, coordinating fabric {each piece needs to be about 20 x 8 inches}

coordinating ribbons {20 inch pieces, 2 per burp cloth}

coordinating thread

sewing machine and accessories

iron & ironing board

materials

To start, wash all fabric and cloth diapers.  The cloth diapers will shrink, and anytime you’re sewing something {especially for a little one}, I think it’s best practice to wash before working with the material!  After washing, everything will also need ironed.

Cut each piece of fabric into 20 x 8 inch pieces.  My cloth diapers measured about 18 inches long, so I allowed myself about 2 inches to fold under.

fold.iron

Once you’ve folded the fabric to fit down the center of the cloth diaper, iron the edges so you have a nice, crisp line to sew along.

Place the fabric piece, wrong side facing down on the cloth diaper and pin the ribbon of your choice down each long side of the fabric.  I think the ribbon gives the burp cloth a more finished look.

pin

Using your sewing machine, sew a straight line down each long side of the fabric and then along the shorter ends as well.

Soon, you’ll have a beautiful set of handmade burp cloths to give as a gift or for your little one.

easy burp cloths3

When I give burp cloths as a gift, I like to give them in sets of three.  They also could be added to a cute diaper cake like I did here.

easy burp cloths2

wtyfgh-signature

Linking up at these fabulous parties!

Related Posts Plugin for WordPress, Blogger...

About Meredith Hazel

Meredith is a stay at home mom and has been blogging since 2012. She started Wait 'Til Your Father Gets Home as a creative outlet in between nap times for her little one. Wait 'Til Your Father gets home is a combination of crafting tutorials, DIY projects, recipes and, sharing some of life's journey along the way.