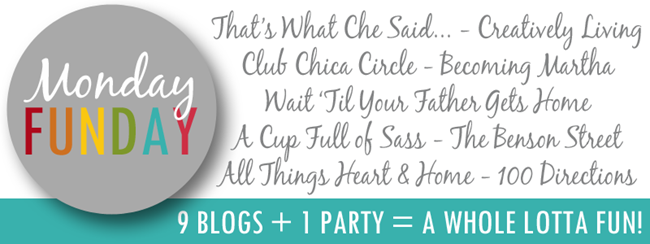
{Chocolate & Oreo Parfait}

{Chocolate & Oreo Parfait}

I recently was in charge of bringing dessert to a play group that Jackson and I went to together last week.  I wanted to do something different, something I’d never made before.  I also didn’t want to have to go out and buy all kinds of ingredients.  After searching through {and organizing} my pantry, I discovered I had several packages of chocolate pudding, just begging waiting to be eaten.  I soon came up with the idea for individual chocolate and Oreo parfaits!

chocolate oreo parfait

To make Chocolate & Oreo Parfait’s you’ll need:

1 package chocolate pudding (I had the larger box)

milk (according to pudding package directions)

1 container Cool Whip

10-15 Oreo Cookies

small mason jars

{recipe makes about 8 small mason jars}

materials

To get started, prepare your chocolate pudding according to package directions.  It shouldn’t take too long to set once you put it in the refrigerator.  While the pudding sets, set the Cool Whip out to thaw if it was in your freezer, wash out the mason jars well, and crush the Oreos using a food processor.  I used my Tupperware Quick Chef….it’s such a great product!

crushed oreos

I also mixed about half of the prepared pudding with half of the container of Cool Whip to add another layer to the finished parfaits.

After about 10 minutes, you should be ready to start assembling!

assemble

It’s up to you how you want to assemble each parfait.  For the most part I added a layer of crushed cookies between each layer of chocolate and/or Cool Whip.

chocolate oreo parfait 2

Let me tell you, these were a big hit, and oh so yummy!  The best part was how easy they were to take in the car as well.  I just set them at the bottom of a reusable grocery bag with the lids tightly secured, and they were good to go!  These would also make a cute treat for Valentine’s Day next week.  You could add some red or pink sprinkles to the top to make them a bit more festive.

craft submission

I’ll be linking up here.

wtyfgh-signature

About Meredith Hazel

Meredith is a stay at home mom and has been blogging since 2012. She started Wait 'Til Your Father Gets Home as a creative outlet in between nap times for her little one. Wait 'Til Your Father gets home is a combination of crafting tutorials, DIY projects, recipes and, sharing some of life's journey along the way.

{Warm Apple Cider}

{Warm Apple Cider}

I hope you all had a fabulous Thanksgiving last week!  It was wonderful to have the time to celebrate and catch up with my husband’s side of the family.  After a nice, {filling} meal, once we were all enjoying a delicious slice of pumpkin pie, my beverage of choice was warm apple cider.  I’ve got a simple and yummy recipe to share with you {and it tastes so much like Starbucks hot apple cider, for just pennies instead of $4+}.

To make Warm Apple Cider, you’ll need:

 4 cups apple cider or juice

 1 t ground cinnamon

1/8 t ground cloves

2 cinnamon sticks

2-3 T caramel sauce

whipped topping {optional}

The best part about this drink is that you can let it simmer in your crock pot or on your stove top all day and it makes the house smell amazing!

Simply add all ingredients {except the whipped topping of course} to either your crock pot or a deep pot on your stove and cook on low for about four hours.  Once your house smells like an apple orchard, your cider is ready!  Top with a dallop of whipped topping if desired and enjoy!

Have a fantastic week!  I’m excited to begin crafting and decorating for Christmas this week, have you started yet?!

I’ll be linking up at these wonderful parties this week!

About Meredith Hazel

Meredith is a stay at home mom and has been blogging since 2012. She started Wait 'Til Your Father Gets Home as a creative outlet in between nap times for her little one. Wait 'Til Your Father gets home is a combination of crafting tutorials, DIY projects, recipes and, sharing some of life's journey along the way.

{Pilgrim Hat Cookies & a Virtual Thanksgiving Dinner}

{Pilgrim Hat Cookies & a Virtual Thanksgiving Dinner}

Have I got a treat for you today!

I’m excited to share that I’m teaming up with several fabulous bloggers to bring you a Virtual Thanksgiving Dinner, complete with recipe ideas, table decor, and desserts!  I seriously cannot wait to try out some of these awesome recipes this Thanksgiving.

My portion of the celebration is a dessert for the kiddos {or any adults that have a strong love for Reese’s Cups and Fudge Stripe Cookies}.

Not only are they super cute, they were so easy to make!  You could even save this as an after dinner create and eat project for the little ones you’re celebrating with!  They would love to get in on the action.

To make Pilgrim Hat Cookies, you’ll need:

white cookie frosting

Reese’s Peanut Butter Cups

Fudge Striped Cookies

To make each cookie, simply unwrap a Reese’s cup,

swirl some cookie icing around the center hole of the cookie {on the all chocolate side},

stick the Reese’s cup to the cookie,

add a circle of icing around the base of the Reese’s cup,

and a little rectangle to one side of the Reese’s cup for the buckle of the hat.

Simple as that!

Soon you’ll have an entire plate of little pilgrim hat cookies to enjoy with the little ones!

Check out the other courses at our virtual Thanksgiving Table today – some awesome blogs have every course covered!

Leaf Placecard Tutorial at One Artsy Mama
Cheeseball Appetizer at Create.Craft.Love (left)
and Hot Cheese Dip and Cracker Tray at Jessie Street Designs (right)
Tips For Cooking a Perfect Turkey at Ladybird Ln. (right)
and Slow Cooker Mashed Potatoes at Artsy Fartsy Mama (left)
Save oven space with Repeat Crafter Me’s Crock Pot Green Bean Casserole (left)
Cranberry Marshmallow Salad at Happy Hour Projects (center)
Cheddar Tea Biscuits at Becoming Martha (right)


Classic Warm Apple Crisp at Chase the Star (left)
Seven Alive’s Favorite Pumpkin Pie (right)


Turkey Cookies at Bear Rabbit Bear Crafts (left)
Pilgrim Hat Cookies at Wait Til Your Father Gets Home (right)

I hope you enjoyed this recipe round up, and you check out my friends’ favorites today too!  What’s your favorite Thanksgiving recipe?

Happy Thanksgiving everyone!

(and be SAFE on Black Friday if you’re brave enough to participate)!

I’ll be linking up at these fantastic parties!

About Meredith Hazel

Meredith is a stay at home mom and has been blogging since 2012. She started Wait 'Til Your Father Gets Home as a creative outlet in between nap times for her little one. Wait 'Til Your Father gets home is a combination of crafting tutorials, DIY projects, recipes and, sharing some of life's journey along the way.

{Candy Bar Cupcakes}

{Candy Bar Cupcakes}

You know you have leftover Halloween candy.  We most definitely did, since our little trick-or-treater can’t exactly eat most of it (not having molars yet will do that to ya)!

To help “get rid” of some of the candy bars, I decided to spice up some plain old chocolate cupcakes this weekend with some delicious candy pieces.  Let me tell you, not only were they super delicious, but they turned out oh so cute!

Take a look…

To make your own, you’ll need:

1 box of chocolate cake mix plus ingredients listed on the box (eggs, oil, water)

chopped candy bars (I used Snickers, Milky Way, and Twix)

To get started, prepare the cake mix according to package directions.  Place some cupcake liners in a muffin tin, mine were from my Pick Your Plum grab box I got two months ago.  I love the scallops at the top!  So cute!

Fill the bottom of each liner with about 1 tablespoon of the cake mix.

Add two to three candy bar pieces on top of the cake mix.  You can mix them up, unless you’d like to have strictly one type of candy per cupcake.

Once you’ve added your candy bar pieces, top the rest of each cupcake with the cake mix until each liner is about 2/3 of the way full!

Bake at 350 for about 18 minutes (or follow your package directions, as some oven times/temperatures vary)!

Once your cupcakes are out of the oven, cool them off for at least half an hour before frosting.

I wanted to have a light frosting with these cupcakes since they were filled with delicious candy, so I decided to make a Chocolate Cool Whip Frosting.

To make the Chocolate Cool Whip Frosting, you’ll need…

1 container Cool Whip

1 package chocolate pudding (the small box)

1/4 cup powdered sugar

1 cup milk

To start, place the pudding mix and the powdered sugar in a bowl.

Add the cup of milk and whisk for about 2 minutes.  It will begin to become pretty thick!

Once you’ve got all the lumps smoothed out, begin to fold in the entire container of Cool Whip.

Now, you’re ready to frost the cupcakes.  If you don’t own piping bags and fancy tips, I’ve got a really easy tip for you.

Take a small glass, put a Ziploc baggie inside, fill the baggie with the frosting, seal the baggie, and snip the end off one corner.

Voila!  Instant piping bag!

Now frost each cupcake.  I like to do a spiral around the top, starting on the outside edges and working my way in to the center.  Garnish the top of each cupcake with more leftover candy bar pieces and you’ve got a delicious and impressive dessert to share!

Now go grab what’s left of your Halloween candy and get baking!  Your family will thank you!!

Enjoy!

I’ll be linking up at these fantastic parties!!

About Meredith Hazel

Meredith is a stay at home mom and has been blogging since 2012. She started Wait 'Til Your Father Gets Home as a creative outlet in between nap times for her little one. Wait 'Til Your Father gets home is a combination of crafting tutorials, DIY projects, recipes and, sharing some of life's journey along the way.

{homemade strawberry pie}

Maybe you’ve had better luck with strawberry plants than I have this season.  Or maybe, like me, you’ve found really great deals at the grocery store lately on strawberries (2 pints for $4 sounds good to me)!  If you encounter some really delicious looking strawberries and are craving something sweet, you’ll definitely want to make this strawberry pie for yourself!

To make homemade strawberry pie, you’ll need:

2 pints fresh strawberries

1 cup sugar

1 cup water

3 T cornstarch

3 T strawberry flavored jello powder

1 graham cracker crust pie tin (just buy the pre-made kind…it’s easy and tastes great)

Wash and trim the strawberries first.  I like to slice the really large berries in half and leave some of the smaller ones whole.  It makes the pie look pretty!

After you’ve rinsed your berries, open the crust packaging and dump all the berries on top.  Arrange them so you’ve got a nice display of fresh strawberries.

Now, you’ll need to prepare the ooey gooey sweetness that makes the pie delicious!  Combine the water, sugar, and cornstarch in a saucepan and bring to a boil.

Once it becomes bubbly and clear, remove from heat, add the jello powder and stir well.

Once the mixture is a pretty red color and looks well blended, pour all of it on top of your awaiting strawberries.  Place the pie in the refrigerator for at least two hours or longer before serving.

Now, enjoy a big slice with a dollop of cool whip!

Doesn’t that look refreshing?!  Make one soon, you won’t regret it!

Enjoy!

Please leave a comment, I love to hear from my readers!

I’ll be linking up at these great parties!

And don’t forget to join me later this evening for the Creative Headquarters Blog Hop!  We made tons of new friends last week…you won’t want to miss it!

Related Posts Plugin for WordPress, Blogger...

About Meredith Hazel

Meredith is a stay at home mom and has been blogging since 2012. She started Wait 'Til Your Father Gets Home as a creative outlet in between nap times for her little one. Wait 'Til Your Father gets home is a combination of crafting tutorials, DIY projects, recipes and, sharing some of life's journey along the way.