Wait Til Your Father Gets Home

Just a bit of all the little bits of life at home!

  • Home
    • About
      • Homeschool Necessities
      • Homeschool Books
      • Meet Meredith
      • Disclosure
      • Advertise
  • Podcast
    • Radical Podcast
  • Homeschool
    • Homeschool Organization
    • Book Lists
    • Sight Words
    • Curriculum
      • Preschool
      • Pre-K
      • Kindergarten
      • First Grade
      • Second Grade
  • Kids
    • Kids Crafts
    • Kids Activities
  • Projects
    • General Crafts
    • DIY
    • Sewing
    • Wreaths
  • Holidays
    • Birthdays
    • Valentine’s Day
    • Easter & Spring
    • St. Patrick’s Day
    • Mother’s Day
    • Father’s Day
    • Fourth of July
    • Halloween
    • Thanksgiving & Fall
    • Christmas
  • Recipes
    • Appetizers
    • Main Dish
    • Snacks
    • Sweets
  • Facebook
  • Pinterest
  • Instagram
  • Twitter

{guest post: the taylor house}

July 5, 2012 By meredith 11 Comments

Welcome to my little corner of the blogosphere, Taylor House readers!  And a special thanks to Chrissy for asking me to guest post for her today!  I’m so excited to share one of my most favorite projects I’ve ever done with all of you.  I know it’s the 5th of July (and I hope all of you had a fantastic 4th), but this planter is the PERFECT addition for any All-American outdoor space.

This planter, like the Mad Planter,  was also inspired by morning Pinterest perusing which led me to Amy @ Positively Splendid.  I love her version with the house number decal!

Since ours was headed to the back yard, we skipped that part.  I’d love to make another set for the front porch in the future though.  To make a three-tiered planter, you’ll need:

materials3

flowers

3 terracotta pots (small, medium, and large) ($28 total from Lowe’s)

primer (already had on hand)

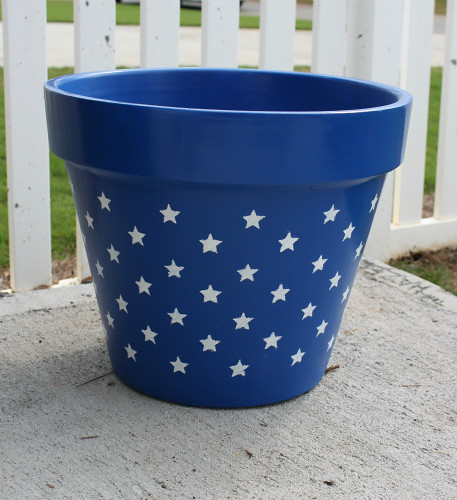
spray paint (I used Krylon Indoor/Outdoor with a Gloss finish in Banner Red and Navy Blue)

enamel (already had on hand)

bricks or stones for largest pot (left over from stack stone walkway project)

potting soil ($4 from Lowe’s)

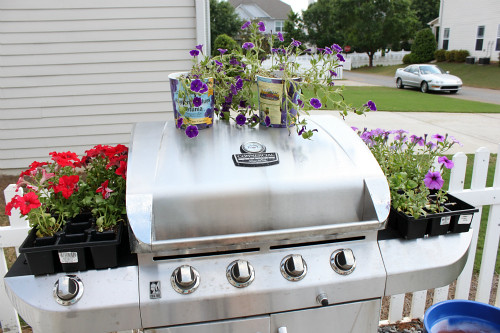
annuals of your choosing (left over from The Mad Planter)

newspaper or tarp (already had on hand)

star stencil (Martha Stewart Holiday Stencils $3.50 with Michael’s 40% off coupon)

painters tape (already had on hand)

Project Total: about $35.50
(A little pricier than I’d like it to be, but these pots will last forever.  When I’m ready for a new color or design, all I have to do is sand them down and paint again!)
For some reason, a few of the steps were neglected in the picture taking process, but you’ll get the general idea below.
Of course, I started by priming all three pots.  The middle sized pot took two coats of primer, since I’d be leaving some white showing.  I wanted to make sure it looked nice and even.  As you can tell, there is an American Flag theme with this planter.  I chose to put stars on the largest pot.  After contemplating a few methods (stickers, sponges, foam pouncers)  to achieve the look we were going for, my husband and I decided to use a stencil and a foam brush to apply the white stars. He painted all of them for me (lucky girl, huh?).  I think he did a fantastic job, and that they truly resemble the star field on the flag!
While the star pot dried, my husband helped me out again by taping the rim of the medium sized pot so we could get red and white stripes across the top. We tried to tape off the entire pot, but the shape of it kept making the lines curve too much (which we didn’t like).  After about 20 minutes of trying to get it just right, I suggested just taping around the top and love the results!  Once it was taped, I simply sprayed on the Banner Red Krylon paint and gave it two even coats.  The tape and the paint worked beautifully…no runs!
The third tier (the smallest pot) was left solid blue.  I didn’t want the planter to look cluttered with another pattern.  You’ll notice there’s a fourth, red pot in the final picture below.  I’ll show you what I did with that little guy in a bit!

steps

After all the pots were painted, I applied two thin coats of enamel to seal and protect them.  Hopefully this step prolongs the life of the planter for a few years before I have to repaint!

Once everything was dry, I was finally ready to assemble the planter and plant my petunias.

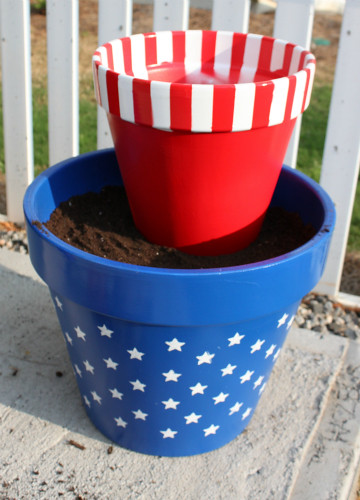
We chose to put the planter on our back patio (that way we could enjoy it more since we spend most of our outside time in the backyard).  Luckily we had some leftover stack stone from a walkway project and set some in the bottom of the largest pot.  This helped to fill most of the lower part of the pot so we weren’t wasting potting soil.

assembly2

assembly

Next, pour some potting soil in the pot and put the medium sized pot on top.  You’ll secure this pot by packing soil tightly around the base.  Make sure to line the pot up to the back side of the largest pot.

assembly3

assembly4

Next, you guessed it, fill the medium sized pot with soil (you could put some stone in the bottom of this one as well if you want).  Repeat the same thing with the top (smallest) pot.  Once I had the medium sized pot where I wanted it, I started to assemble and plant at the same time.

assembly5

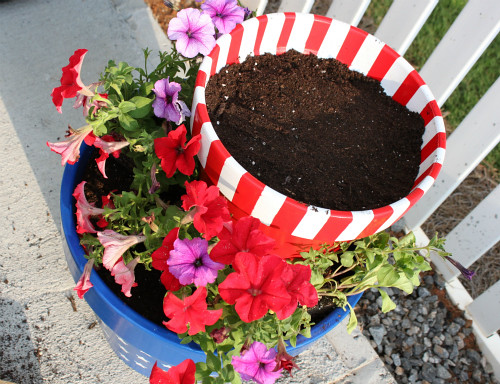
Soon, I had this beauty…

planter2

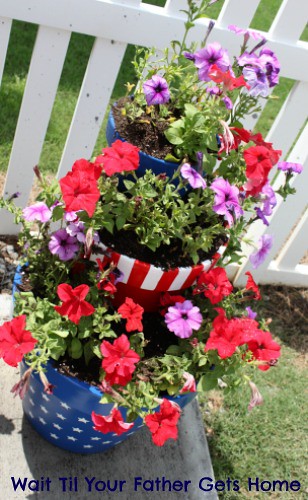
I’m thrilled with this planter project as well and have fittingly decided to call this one the…

I’m really happy that we figured out a good method for applying the stars because it really makes the entire planter if you ask me!

While creating this planter, I realized that I had one more pot left over and decided to stencil on a firework pattern that was also on the Martha Stewart stencil pack that I bought at Michael’s.  I found a home for it on our outdoor table…

tabletop

Thanks again to Chrissy for having me today!  For more crafty ideas, DIY projects, and yummy recipes please become a follower of {Wait Til Your Father Gets Home}!

You can connect with me on Facebook, Twitter, and Pinterest.  I look forward to hearing from some of you soon!

Enjoy!

Related Posts Plugin for WordPress, Blogger...

Share this:

  • Facebook
  • Twitter
  • Pinterest
  • LinkedIn
  • Tumblr
  • Email

Filed Under: Crafting, Decorating, Gardening, Guest Posts Tagged With: 4th of july, decor, flowers, planters

« {favorite pins friday #7}
{guest post & christmas in july gifts} »

Comments

  1. Sarah says

    July 5, 2012 at 1:12 pm

    These are so cute! 🙂 I love the firework one the most!

    Reply
    • waittilyourfathergetshome says

      July 5, 2012 at 8:49 pm

      Thanks so much Sarah!! 🙂

      Reply
  2. kara says

    July 6, 2012 at 5:48 pm

    Love how these came out!

    Reply
    • BETTY LOU GILLIARD says

      July 6, 2012 at 10:48 pm

      First let me say I LOVE the pots however I want to comment you on showing just how they are made step by step that did impress me. I am going out tomorrow and buy the supplies I need and follow your instructions I am so pleased that you did that. Thanks THANKS Thanks BETTY

      Reply
      • waittilyourfathergetshome says

        July 7, 2012 at 8:47 pm

        You’re welcome!!

        Reply
  3. Nellie says

    July 8, 2012 at 11:04 pm

    Hi Meridith,
    I came over from Walking on Sunshine, and absolutely love your cute planter. what a great
    idea, and it really looks so pretty…………..great job!

    blessings, Nellie

    Reply
    • waittilyourfathergetshome says

      July 9, 2012 at 1:53 am

      Thanks Nellie! I’m so glad you stopped by 🙂

      Reply
  4. Barbara says

    July 9, 2012 at 9:57 pm

    Meredith, this so great! Please come over and make one for me! What a clever idea:)

    Barbara

    Reply
    • waittilyourfathergetshome says

      July 10, 2012 at 7:52 pm

      Wish I could! Cali is a bit of a drive from here though 🙂

      Reply
  5. Marta Newby says

    July 10, 2012 at 4:29 pm

    I just love this ,it’s beautiful !!I made you’re mad planter and have gotten so many wonderful comments on it!!

    Reply
    • waittilyourfathergetshome says

      July 10, 2012 at 7:51 pm

      Thanks! Glad you like it 🙂

      Reply

Leave a Reply Cancel reply

Your email address will not be published. Required fields are marked *

This site uses Akismet to reduce spam. Learn how your comment data is processed.

Get Posts Via Email

Timberdoodle

Featured Posts

Get 1 Year for $45 - 62% off!
All About Reading Activity Bundle

Follow On Facebook

Affiliates

Archives

Copyright

YOU ARE WELCOME TO LINK TO THIS SITE AND USE A SINGLE IMAGE TO LINK BACK TO ANY DIRECT POST. ALL BORROWED CONTENT MUST BE LINKED BACK AND PROPERLY CREDITED. USING PHOTOS OF MY CHILDREN AND FAMILY IS OFF LIMITS! DO NOT USE THESE ON YOUR SITE WITHOUT PERMISSION. DO NOT REPUBLISH ONE OF MY POSTS IN WHOLE OR IN PART AS THIS STRICTLY PROHIBITED WITHOUT THE PROPER PERMISSIONS. PLEASE DON'T HESITATE TO CONTACT ME! THANK YOU!

[footer_backtotop]

Copyright © 2025 · Blog Design by Key Lime Digital Designs · Genesis Framework by StudioPress · WordPress · Log in