Last week I attended the SNAP! conference in Thanksgiving Point, Utah. I’m so excited to share my experience with all of you over the next few weeks. Until then, I wanted to share my final project from my Online Fabric Store purchase,
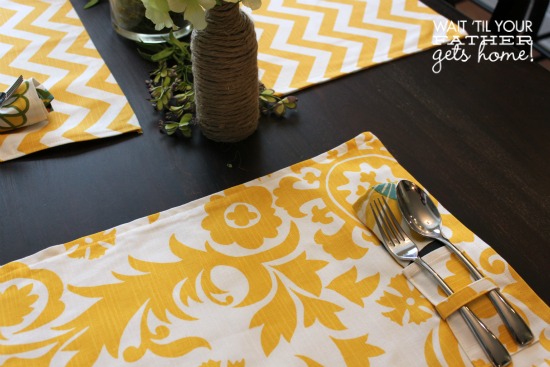
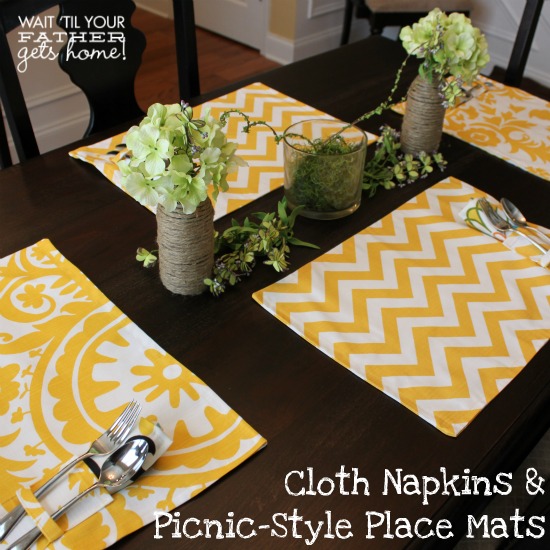
Picnic-Style Place Mats
To make your own set of four, you’ll need:
1 yard of fabric {I used two patterns, so I went through 1/2 yard of each}
coordinating thread
scissors or rotary cutter
sewing machine
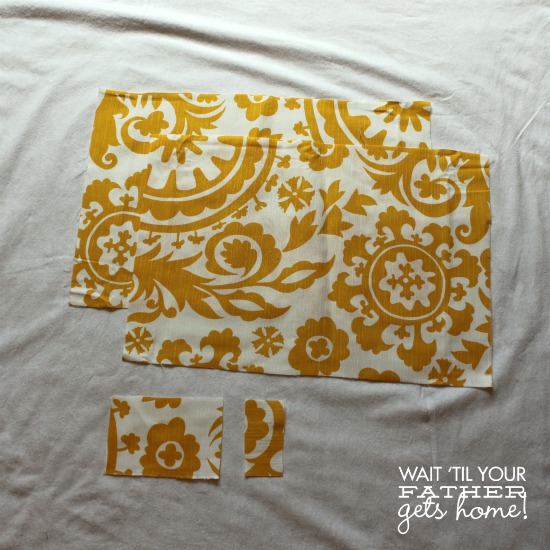
You’ll want to make the following cuts for each place mat:
2 pieces– 20 x 15″
1 piece {napkin pocket}– 6 x 4″
1 piece {utensil holder}– 2 x 4″
The first thing I did for each place mat, was to sew the actual place mat together. You’ll want to sew with a 1/4 inch seam allowance, right sides facing each other. Leave a small opening to turn the fabric right-side out, and finish off with a top stitch of 1/4 inch.
Next I prepared the utensil holders {please excuse the gross ironing board cover}.
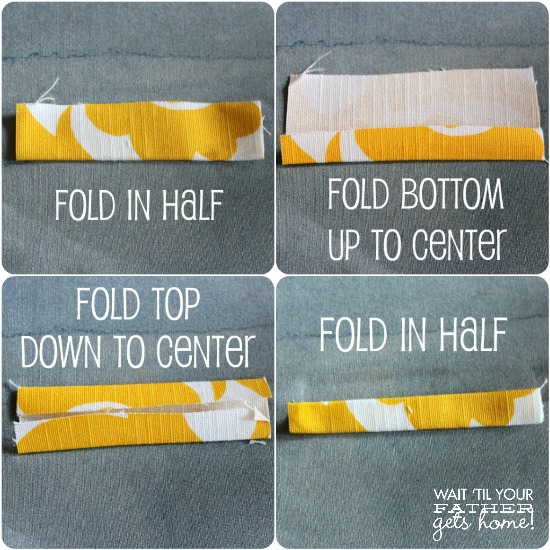
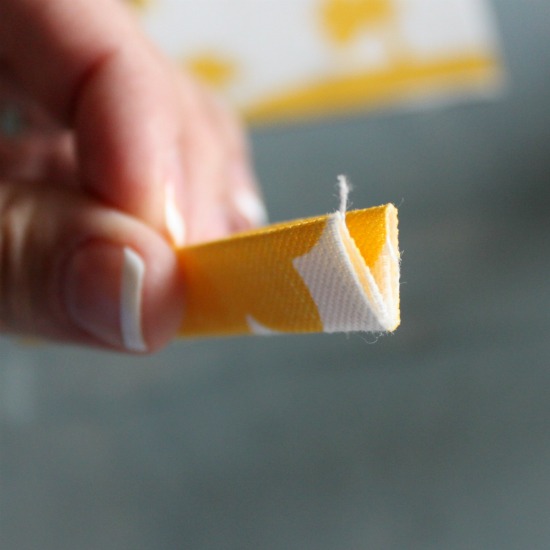
Fold the utensil holder piece in half, length-wise and iron a nice crease. Next, unfold the crease you just made and fold the bottom portion up to the crease line. Iron it. Do the same for the top; fold it down to the center crease and iron that. Finally fold the entire piece in half again and iron it with the best possible crease you can achieve.
It will look like this from the side…
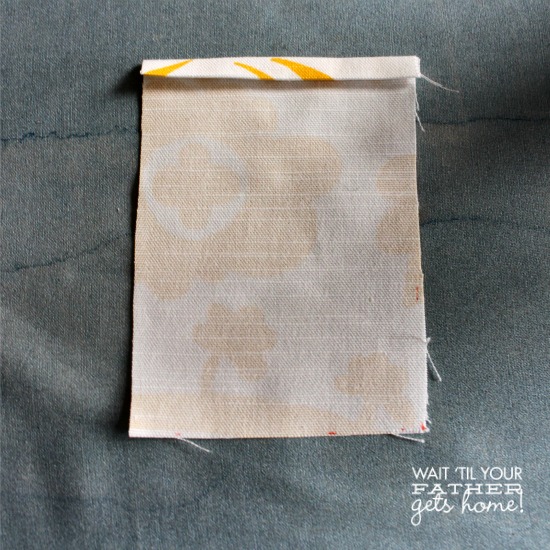
Now, to prepare the napkin pocket, fold a double 1/4 inch hem along one of the short sides {this will be the top of your pocket}. Iron it, creating a good crease.
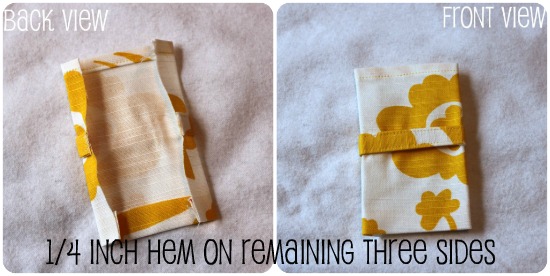
Now, sew along the two long sides of the utensil holder and along the top hem of the napkin pocket.

Attach the utensil holder to either side of the napkin pocket by sewing it in place. You’ll then need to get out the iron again and fold 1/4 inch hem on the remaining three sides of the napkin pocket.
Again, the iron is your friend in this project. Make sure to get the best possible crease you can! It will only make the sewing part go much smoother!
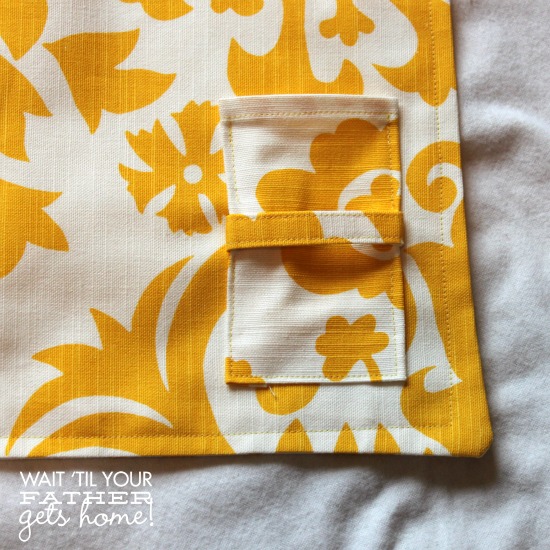
Now, to attach the pocket to the place mat, pin it in place on the lower right corner, 1 inch from the side and the bottom hems.
I did not sew through the utensil holder piece as it was pretty thick in that part and my sewing machine tends to be kinda wimpy when there is more than two layers involved.
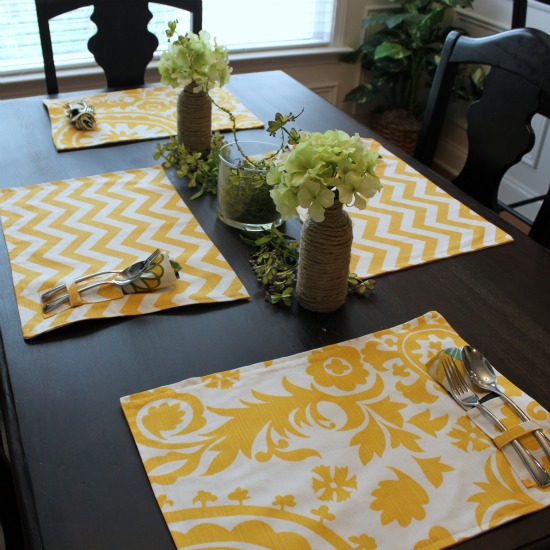
I absolutely adore these place mats and think the set of four paired with the cloth napkins would make sure a cute wedding shower gift. You could roll them up and add them to a cute picnic basket with yummy food and a bottle of wine!
For a full tutorial on how to make the Cloth Napkins, click here.

Nothing says Spring quite like an afternoon picnic, don’t you think?!
To read more about my experience with Online Fabric Store, click here.

I’ll be linking up at these parties.


I so heart these!
Thank you! They were so easy to make!! 🙂
I love these placemats! They are so darling! Chevron is still alive and well!!! 🙂
These are really clever, thanks!
Absolutely! Thanks so much for stopping by 🙂
These are so cute and I love the bright yellow color!
Thanks so much!!
These are just gorgeous!!! I love the fabric and the utensil pocket too … very nice!
Thanks Kara!!
Hi Meredith,
These are adorable, I love the little pockets you added. And I LOVE your fabric choices, I have all those same fabrics waiting to be sewn into cushions right now – I even used that Suzani to make no-sew curtains to cover my washer/dryer. Your table looks so springy and cheerful … and they would be perfect for picnicking! Thanks for sharing this super fun tutorial.
Krista
Thank you so much for stopping by and your sweet comment! So glad you liked them!! Cute curtains in the laundry room sound so fun by the way 🙂
This is really pretty. I am going to pin it.
Have a great day.
Ellya
Awesome! Thank you so much 🙂
I just love this, how easy and cute!!!
Hugs
Cami @ TitiCrafty by Camila
These are great. Thanks for the clear directions and photos.
So fun and beautiful! I’ve been wanting to make some placemats — you’ve inspired me to give it a try!
DO IT! It’s way too easy…I promise!!
Awesome i love the little utensil holder! Hopping over from TT&J
Thanks! It’s my favorite part too 🙂
Have a fun weekend!!
These are so cute! What kind of fabric did you use?
Thanks so much! It was upholstery fabric 🙂
Yay! Thanks for letting me know. These would be such a cute gift too.
Thanks so much for linking to Make the Scene Monday @ Alderberry Hill. You are being featured this evening!
I hope you are having a wonderful weekend, and join me tomorrow evening for Make the Scene Monday #72!
Thanks for the feature Sarah! See you tomorrow at the party!! 🙂
These area adorable! I love the patterns! Thanks for joining us at Monday Funday! I miss your face! xoxo – Cheryl
Thanks love! Miss you too!! xox
Such a cute idea Meredith! and I LOVE the fabric
Thanks for linking up! I featured your post in my wrap up http://tidymom.net/2013/mothers-day-ideas-2/
Have a super Sunday!
Super cute, pinning 🙂
Thanks so much!!
These are just so delightful, Meredith! I adore the patterns you picked out. We are in the process of remodeling our kitchen so I’m hoping to do all custom linens for when it’s finished and this project just got added to the list 🙂 Thanks for sharing!!
Absolutely! So glad you liked them 🙂
You did a great job with these, they are so perfectly done! I can never seem to get all my edges perfectly straight when I try to make place mats/ napkins. These are beautiful! Love the fabrics, too!
Thanks so much for stopping by!
I love this! So pretty 🙂
I’ve featured it today and I’ve pinned this post!
http://www.52mantels.com/2013/04/colorful-home-ideas.html
Love, love, love these. Did you use Home Dec fabric or regular fabric? I’ve never made place mats, and I’ve wondered about this because of cleaning/washing. Some home dec fabrics don’t let you toss them in the wash.
I used home decor fabric and it said it was okay to machine wash 🙂
These are so. The tutorial is really good and it made it look doable, even for someone that isn’t good friends with their sewing machine, like me.
You can totally do it…this one’s easy, I promise!!
I absolutely love them! I ALWAYS have placemats on my table at all times so I will definitely be making these soon! I have lots of home decor fabric in my stash but I’m not sure if any is washable. I may have to buy some more just to make sure. 🙂
Buying more is always a fun option! 🙂
Featuring 2 of your projects today! Thanks so much for linking up to {wow me} wednesday! It was so nice meeting you at Snap! 🙂
Ginger @ GingerSnapCrafts.com
http://www.gingersnapcrafts.com/2013/05/20-sewing-projects-linkparty-feature.html
I’d like to invite you to my Friday Flash Blog, where you can share your best blog entry of the week! The party goes on ALL weekend at thejennyevolution.com. And who knows, you may just get featured next week.
Jennifer
thejennyevolution.com
I love your placemats and your fabric! What is the name of the fabric patterns you used?
Thanks so much! All fabric was from OnlineFabricStore.net and they are called Zig Zag Corn Yellow & Suzani Corn Yellow 🙂