Wait Til Your Father Gets Home

Just a bit of all the little bits of life at home!

  • Home
    • About
      • Homeschool Necessities
      • Homeschool Books
      • Meet Meredith
      • Disclosure
      • Advertise
  • Podcast
    • Radical Podcast
  • Homeschool
    • Homeschool Organization
    • Book Lists
    • Sight Words
    • Curriculum
      • Preschool
      • Pre-K
      • Kindergarten
      • First Grade
      • Second Grade
  • Kids
    • Kids Crafts
    • Kids Activities
  • Projects
    • General Crafts
    • DIY
    • Sewing
    • Wreaths
  • Holidays
    • Birthdays
    • Valentine’s Day
    • Easter & Spring
    • St. Patrick’s Day
    • Mother’s Day
    • Father’s Day
    • Fourth of July
    • Halloween
    • Thanksgiving & Fall
    • Christmas
  • Recipes
    • Appetizers
    • Main Dish
    • Snacks
    • Sweets
  • Facebook
  • Pinterest
  • Instagram
  • Twitter

Quilt Along Week 5: Binding the Quilt

August 20, 2013 By meredith 2 Comments

Some materials for this quilt were provided to me by OnlineFabricStore.net.  They are a fabulous company to work with, and as always, all opinions are 100% my own!

OFS-quilt-banner

I’ve unofficially declared this week, the week of the quilt!  I’m FINALLY sharing with all of you the finishing touches to making my first ever quilt with the help of my totally awesome friends at OnlineFabricStore.net.

In case you missed any step along the way, here are the previous posts:

Week One: Gathering Materials

Week Two: Cutting the Fabric

Week Three: Piecing the Quilt

Week Four: The Quilt Sandwich

During Week Five, I took a stab at my first experience making binding.  Let me tell you, this part was so fun!  I was finally able to start to see the quilt really come together {and there was light at the end of the tunnel}!

Binding a Quilt via www.waittilyourfathergetshome.com #quilt #sewing

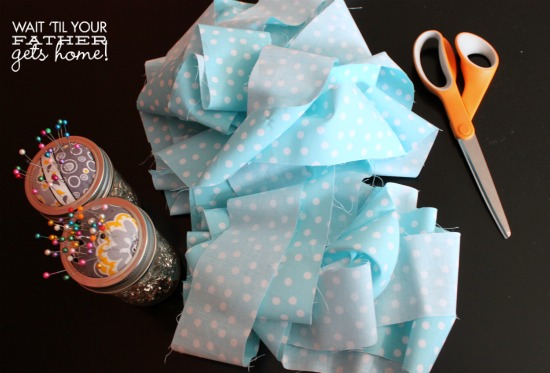
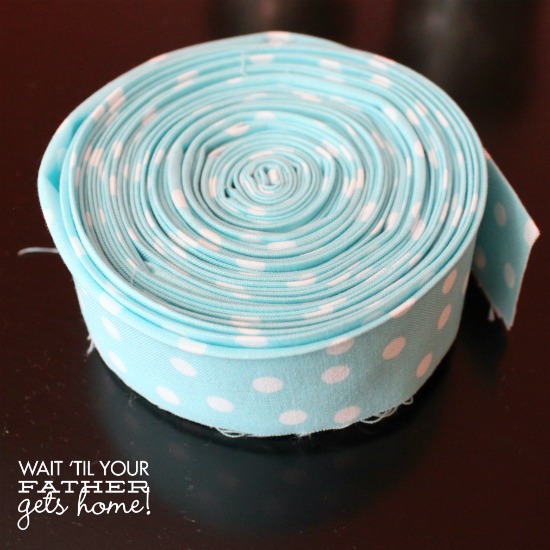
Remember those binding strips that I cut many weeks ago?  Luckily I didn’t lose them or throw them out!  To make the binding, sew the strips end to end to make one LONG strip.  Press open the seams and then iron the entire strip in half, lengthwise.  Once ironed, roll it up so it’s more manageable.

Binding a Quilt via www.waittilyourfathergetshome.com #quilt #sewing

After the binding was prepared, I still needed to trim the extra backing and batting on my quilt.  This is where my cutting mat, rotary cutter, and acrylic rulers were once again my best friends.

Binding a Quilt via www.waittilyourfathergetshome.com #quilt #sewing

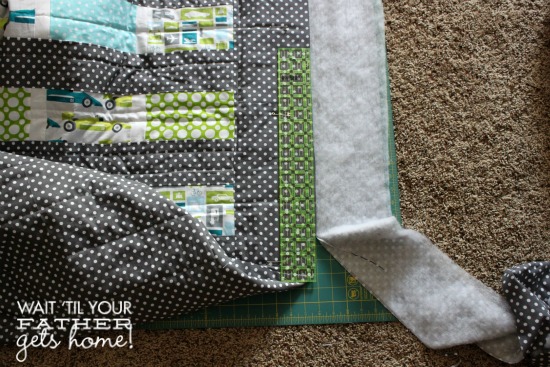
To begin pinning my binding strip to the quilt, I flipped the entire quilt so that the quilt top was face down.

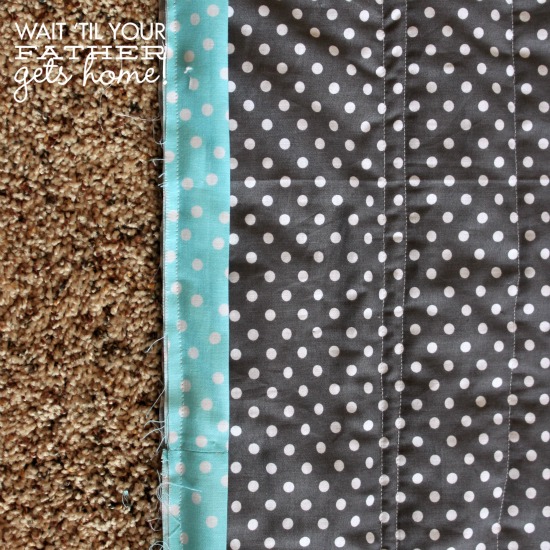
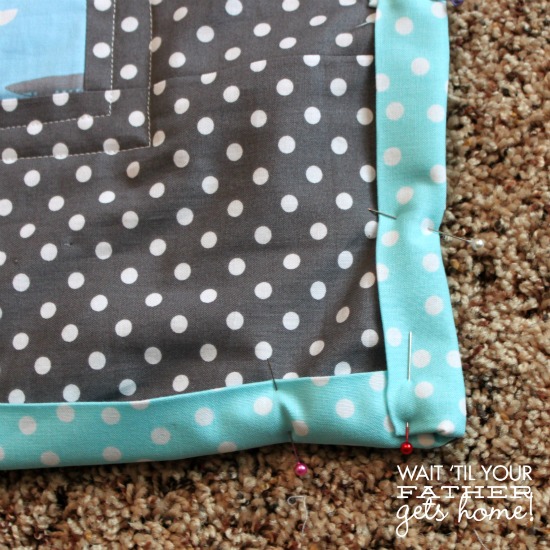
I pinned the binding strip to the BACK of the quilt.  The unfinished edge of the binding tape should meet up with the unfinished edge of the quilt back.  At the corners, I pinned the binding tape at a 45 degree angle and folded the fabric to continue pinning along the next side.

Binding a Quilt via www.waittilyourfathergetshome.com #quilt #sewing

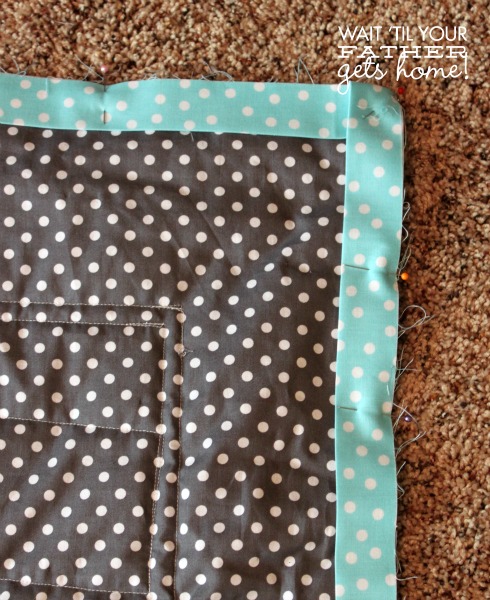
Once I reached the point where I started, I opened the binding and pinned the edges of the binding tape together.  I sewed the two ends together, trimmed the extra fabric and pinned in place.

Binding a Quilt via www.waittilyourfathergetshome.com #quilt #sewing

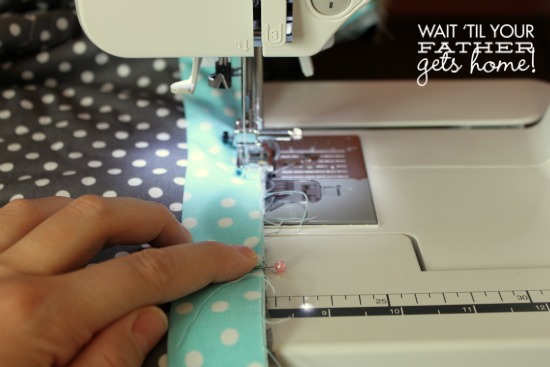
I sewed the binding to the back of the quilt using a 1/4 inch seam allowance.  When I got to a corner, I lifted the sewing needle and foot, VERY carefully turned the quilt, and flipped the corner over.  Once this was done, I put the foot back down and continued to sew along the next side.

Binding a Quilt via www.waittilyourfathergetshome.com #quilt #sewing

Binding a Quilt via www.waittilyourfathergetshome.com #quilt #sewing

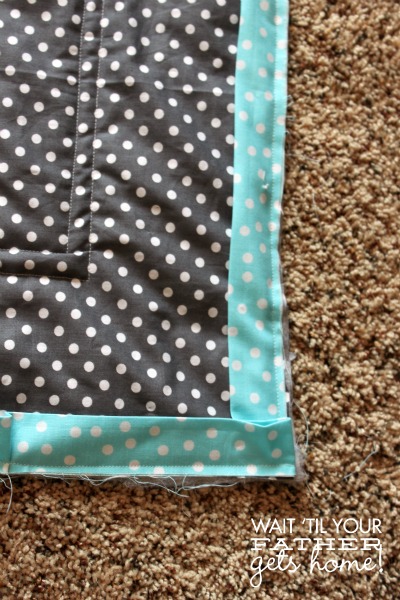
Next was the actual binding of the quilt.  I flipped the entire quilt over so that the quilt top was facing up now, folded the binding tape over to the front, and pinned it in place around the entire quilt.

Binding a Quilt via www.waittilyourfathergetshome.com #quilt #sewing

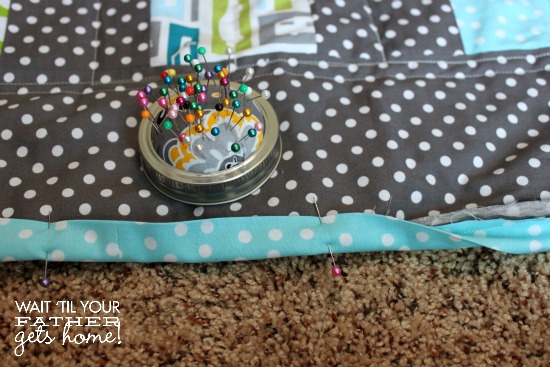
Here’s how I pinned the corners:

Binding a Quilt via www.waittilyourfathergetshome.com #quilt #sewing

I sewed around the entire edge of the quilt, as close to the edge of the binding as possible.

I’m SO excited to finally share my finished quilt with all of you later this week!  Check back on Friday to see my finished Fat Quarter Boy’s Toys Quilt.

wtyfgh-signature

Related Posts Plugin for WordPress, Blogger...

Share this:

  • Facebook
  • Twitter
  • Pinterest
  • LinkedIn
  • Tumblr
  • Email

Filed Under: Quilting, Sewing Tagged With: quilt along, quilting, sewing

« Quilt Along Week 4: Quilting
Eight DIY Projects To Try »

Comments

  1. Gracemarie Thames says

    August 20, 2013 at 3:36 pm

    It looks great Meredith! I don’t know when you found the time to do this, or blog about it! You did a great job!!

    Reply
    • meredith says

      August 20, 2013 at 9:51 pm

      Thanks Grace!! I don’t know when I found the time either! haha

      Reply

Leave a Reply Cancel reply

Your email address will not be published. Required fields are marked *

This site uses Akismet to reduce spam. Learn how your comment data is processed.

Get Posts Via Email

Timberdoodle

Featured Posts

Get 1 Year for $45 - 62% off!
All About Reading Activity Bundle

Follow On Facebook

Affiliates

Archives

Copyright

YOU ARE WELCOME TO LINK TO THIS SITE AND USE A SINGLE IMAGE TO LINK BACK TO ANY DIRECT POST. ALL BORROWED CONTENT MUST BE LINKED BACK AND PROPERLY CREDITED. USING PHOTOS OF MY CHILDREN AND FAMILY IS OFF LIMITS! DO NOT USE THESE ON YOUR SITE WITHOUT PERMISSION. DO NOT REPUBLISH ONE OF MY POSTS IN WHOLE OR IN PART AS THIS STRICTLY PROHIBITED WITHOUT THE PROPER PERMISSIONS. PLEASE DON'T HESITATE TO CONTACT ME! THANK YOU!

[footer_backtotop]

Copyright © 2025 · Blog Design by Key Lime Digital Designs · Genesis Framework by StudioPress · WordPress · Log in