Some materials for this quilt were provided to me by OnlineFabricStore.net. They are a fabulous company to work with, and as always, all opinions are 100% my own!

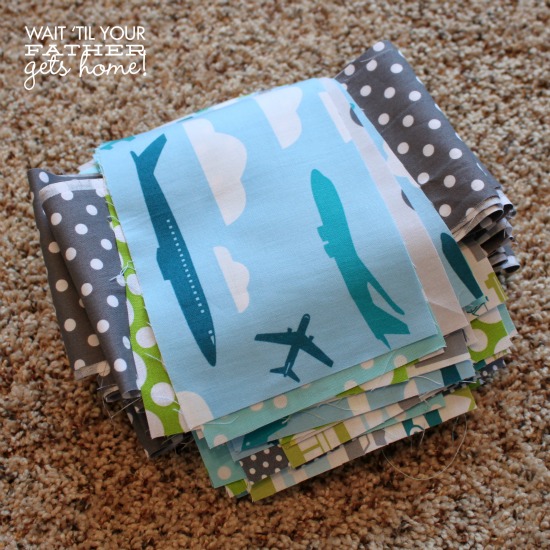
If you’ll recall, week one was spent gathering my materials and week two was spent mastering the rotary cutter.
During the third week of the Quilt Along, hosted by Becoming Martha and Create.Craft.Love, I began piecing my quilt top together.
Remember, this is the pattern I’m following via {allpeoplequilt.com}
Piecing the Quilt
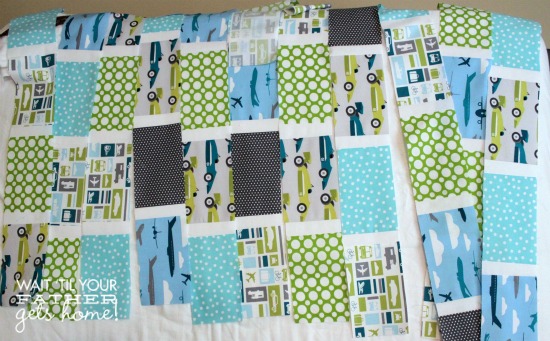
Grab that top row from your quilt pile.
Place the first piece on your sewing table, and add your first small rectangle on the right hand side of the large rectangle. For each row you will have seven large rectangles separated by six smaller rectangles.
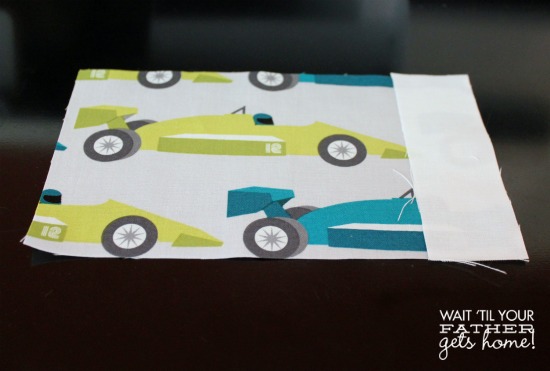
Using a 1/4 inch seam allowance, stitch the length of the small rectangle. Since it was such a small piece of fabric, I made sure to line up my edges perfectly and didn’t bother to pin.
After you sew that piece, open it up. You will place the next large rectangle FACE DOWN on top of that piece. Line up the right hand edges and stitch again, continuing until you have a row of seven large rectangles and six small rectangles.
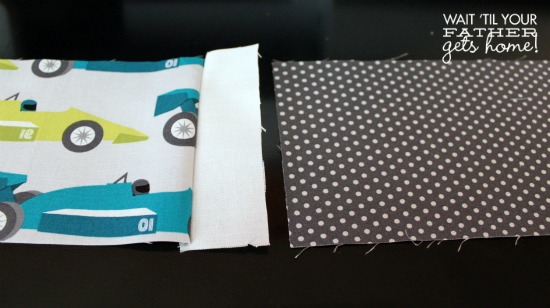
{showing you where the fabrics would line up, the Michael Miller Dumb Dot Charcoal Fabric from OFS was stitched FACE DOWN on top of the right edge of the small white fabric}
Keep your rows in order, you don’t want all that planning to go to waste, now do you?!
I lined all of mine up on a lone mattress that we have yet to sell or use or giveaway that’s just hanging out in our office area.
Once all twelve rows are sewn, press the seams open with your iron.
Now to begin assembling the quilt top…
Lay out your top row of rectangles. Place the first sash, FACE DOWN, on top of it – aligning with the bottom of the rectangle row. Pin that edge and sew along the pinned edge.

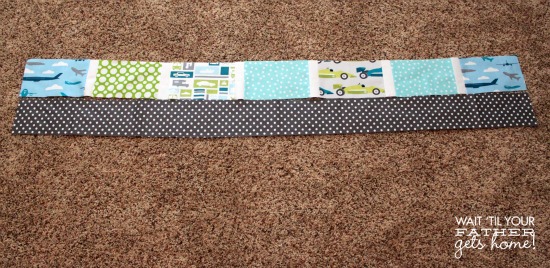
Now open up your sewn piece. Place the next row of rectangles, FACE DOWN and UPSIDE DOWN, aligned with the bottom of the sash. Line up your small rectangle seams as best as you can. Pin along that bottom edge and sew again. Repeat that process until you have the entire quilt top sewn. You will end up with twelve rows of rectangles separated by eleven rows of sashes.
Note: I pressed my seams open after sewing each row so it would lay better as I worked. Trust me, it’s a little time consuming, but it makes it easier!
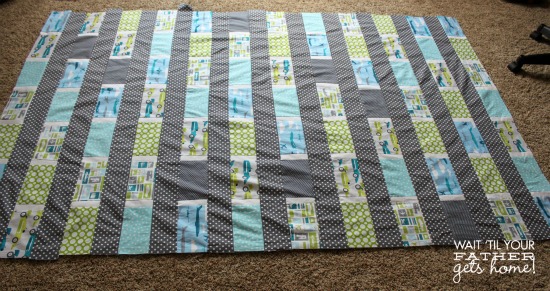
Once all the rows and sashes are assembled, square off your edges that may be a little longer than others by using your rotary cutter and cutting mat.
You can then add the borders. I added both long borders first {pin along the long edges, FACE DOWN, sew, and press seams open}, then I added the short borders using the same method.
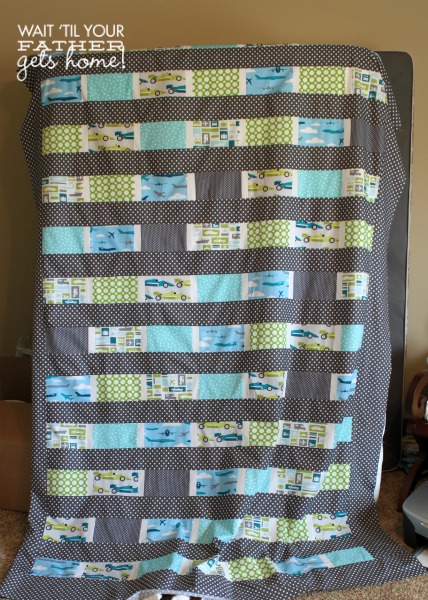
Next week, I’ll begin quilting the quilt…wish me luck!


I LOVE how this turned out, what a cute boy quilt! I am going to have to go back now and start the quilt along too.
It is looking great! Can’t wait to see how you quilt it!
It’s so cute! I love the transportation theme!