{Garden, Year Two}

{Garden, Year Two}

After about two week’s time of getting our house painted {which finally included getting our front door painted} and then weekend after weekend of nonstop rain, me and my 35 week pregnant self FINALLY planted the veggies in our garden!

This is our second year having a vegetable garden, and I made some adjustments to last year’s plan.

Last year I didn’t exactly have a plan, but what I did have was way too much going on.

My handy husband made two raised garden beds on the side of our house.  I wish I would have actually taken photos of the building process.  From now on, when he’s building anything around the house, I promise to take pictures and share plans!

Plant a Veggie Garden @ Wait Til Your Father Gets Home #vegetables #garden #raisedbeds #seeds

Last year I planted WAY TOO MUCH!  The long list included tomatoes, cucumber, zuchinni, squash, peas, carrots, several herbs, cantaloupe  strawberries, chives, garlic, green pepper, jalapeno, and corn.  Plus I added some marigolds to either side of each bed {that got HUGE}!

Plant a Veggie Garden @ Wait Til Your Father Gets Home #vegetables #garden #raisedbeds #seeds

Plant a Veggie Garden @ Wait Til Your Father Gets Home #vegetables #garden #raisedbeds #seeds

See…way too much going on there!  I could hardly get in there to pick veggies! And we soon realized that there were only certain ones we were actually eating.

This year, I made a lot of adjustments and only planted what I knew we’d eat.

Plant a Veggie Garden @ Wait Til Your Father Gets Home #vegetables #garden #raisedbeds #seeds

Bed number one has two kinds of tomatoes {along the back} and two vertical rows, one of green pepper and the other zuchinni.

Plant a Veggie Garden @ Wait Til Your Father Gets Home #vegetables #garden #raisedbeds #seeds

Bed number two has two more types of tomatoes {that still need tomato cages}, squash, and a row of green beans {planted as seeds} along the front of the bed.  I need to put up some netting for the beans to attach and vine along soon.

I’m so glad I was finally able to get it all planted, now come on veggies, do your ‘thang and start growing!  I’m ready to stop buying produce at the grocery store for awhile!

Do you plant a garden each year?  Any tips or secrets to share for successful veggie growth?

wtyfgh-signature

I’ll be linking up at these parties!

About Meredith Hazel

Meredith is a stay at home mom and has been blogging since 2012. She started Wait 'Til Your Father Gets Home as a creative outlet in between nap times for her little one. Wait 'Til Your Father gets home is a combination of crafting tutorials, DIY projects, recipes and, sharing some of life's journey along the way.

{Wine Cork Garden Markers}

{Wine Cork Garden Markers}

I’ve got a super easy and super fast craft for all of you today.  I emphasize the super fast part as I’m sharing this craft as part of 30 Minute Crafts & The Country Chic Cottage‘s

CRAFT LIGHTNING WEEK!


I noticed last year when planting my garden that my herbs just didn’t seem to do too well outside.  Most of them got overtaken by some pretty crazy zuchinni {that stuff seriously grows like a weed} or they died because I think it was just a bit too hot for them.

This year, I decided on a few favorite herbs, bought myself a cute planter, and decided that they would be mostly indoor herbs.  I put them outside when the sun is shining to give them some natural light, otherwise, they stay in my kitchen.  Once they start really growing {I planted them as seeds}, I won’t have to leave the kitchen while cooking to add some fresh herbs to my meals.

I wanted to make sure to have some cute plant markers, so I knew which was which and came up with this little idea.

Wine Cork Garden Markers

Easy Wine Cork Garden Markers @ Wait Til Your Father Gets Home; makes a great gift #garden #winecorks #herbs #planters

To make some for your herbs or your outdoor garden, you’ll need the following supplies:

wine corks

wooden skewers

black sharpie

polyurethane sealer {if using outdoors}

Easy Wine Cork Garden Markers @ Wait Til Your Father Gets Home; makes a great gift #garden #winecorks #herbs #planters

Now, all you have to do is write out each herb, veggie, or fruit onto individual wine corks.  Poke the pointy end of the skewer into the bottom of the cork and place the skewer in the correct planter.

Easy Wine Cork Garden Markers @ Wait Til Your Father Gets Home; makes a great gift #garden #winecorks #herbs #planters

Now, that’s what I call a Craft Lightning project!

Easy Wine Cork Garden Markers @ Wait Til Your Father Gets Home; makes a great gift #garden #winecorks #herbs #planters

If you’re using these outside, make sure to apply a coat of polyurethane sealer to keep the marker from fading away.

I’ll be linking up at these fabulous parties!

wtyfgh-signature

About Meredith Hazel

Meredith is a stay at home mom and has been blogging since 2012. She started Wait 'Til Your Father Gets Home as a creative outlet in between nap times for her little one. Wait 'Til Your Father gets home is a combination of crafting tutorials, DIY projects, recipes and, sharing some of life's journey along the way.

{Fall Inspiration & How To’s with Miracle-Gro & the Gardenieres}

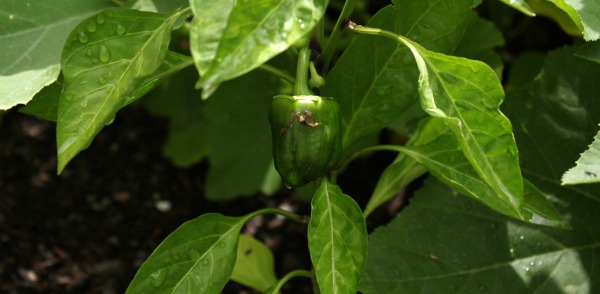
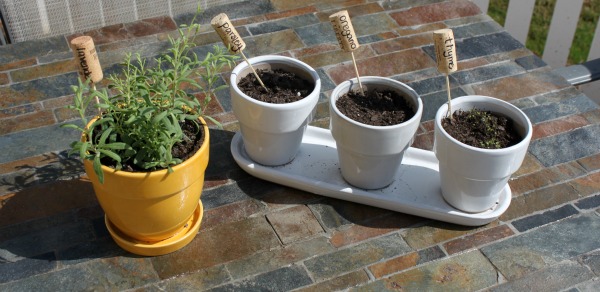
This is a Sponsored post written by me on behalf of Miracle-Gro for SocialSpark. All opinions are 100% mine.

Adding color ito my front porch and garden beds seems to always be one of the first things I do each season.  I love the new-ness of adding fresh flowers to both my beds and a few planters on the front porch.  It really helps bring in the season properly!

This Fall, Miracle-Gro & the Gardenieres are here to help you Find beauty in the Fall with some gardening inspiration from the Gardenieres & Miracle Gro!

(1) Miracle-Gro

Master Gardener, William Moss is teaming up with Miracle-Gro to bring all of us the Gardenieres.  Many different gardeners that team up with Miracle-Gro are being featured on the Gardenieres website showcasing their unique projects and ideas using Miracle-Gro and the great outdoors (or indoors in some cases)!  Take a look at a Gardeniere creating a potted herb garden now…

This is definitely a project I’d love to tackle!  I did have a wonderful vegetable garden last spring, but neglected to really pay attention to including herbs in my garden plan.  This season, I will definitely be paying better attention to this and adding as many herbs as possible to my gardening wish list!  To help make my herbs and vegetables flourish, I’ll definitely be using Flower & Vegetable Garden Soil from Miracle-Gro.  We used it last year and had tremendous results!

MG_Flower_Veg_Garden_Soil.jpg

For many other ideas and the chance to interact with fellow gardeners, visit the Miracle-Gro Facebook page and become a follower!  Once you’ve “liked” them you’ll be notified of tips and tricks and have the ability to interact with fellow gardeners and gardening enthusiasts like yourself!

Miracle Gro most definitely gives us regular folk (and those experienced gardeners as well) the green thumb we never knew we had!  With Miracle-Gro & inspirational video tutorials from the Gardenieres this season, you’re sure to find some new ways to bring your yard and gardens alive as we get closer and closer to those cold winter months!

Advertisement

Visit Sponsor's Site

About Meredith Hazel

Meredith is a stay at home mom and has been blogging since 2012. She started Wait 'Til Your Father Gets Home as a creative outlet in between nap times for her little one. Wait 'Til Your Father gets home is a combination of crafting tutorials, DIY projects, recipes and, sharing some of life's journey along the way.

{star spangled planter}

{star spangled planter}

As promised, I’m back this week with the second planter that we created for our back yard.  We stuck with red, white, and blue theme, using good ole’ Krylon Indoor/Outdoor Spray paint once again in Banner Red and Navy Blue.  This planter, like the Mad Planter,  was also inspired by morning Pinterest perusing which led me to Amy @ Positively Splendid.  I love her version with the house number decal!  Since ours was headed to the back yard, we skipped that part.  I’d love to make another set for the front porch in the future though!  To make a three-tiered planter, you’ll need:

materials3

flowers

(Left over flowers from this project)

  • 3 terracotta pots (small, medium, and large) ($28 total from Lowe’s)
  • primer (already had on hand)
  • spray paint (I used Krylon Indoor/Outdoor with a Gloss finish in Banner Red and Navy Blue)
  • Polyurethane (already had on hand)
  • bricks or stones for largest pot (left over from stack stone walkway project)
  • potting soil ($4 from Lowe’s)
  • annuals of your choosing (left over from The Mad Planter)
  • newspaper or tarp (already had on hand)
  • star stencil (Martha Stewart Holiday Stencils $3.50 with Michael’s 40% off coupon)
  • painters tape (already had on hand)
Project Total: about $35.50 (Again, pricier than I’d like it to be, but these pots will last forever.  When I’m ready for a new color or design, all I have to do is sand them down and paint again!)
For some reason, a few of the steps were neglected in the picture taking process, but you’ll get the general idea below!
Of course, I started by priming all three pots.  The middle sized pot took two coats of primer, since I’d be leaving some white showing.  I wanted to make sure it looked nice and even.  As you can tell, there is an American Flag theme with this planter.  I chose to put stars on the largest pot.  After contemplating a few methods (stickers, sponges, foam pouncers)  to achieve the look we were going for, my husband and I decided to use a stencil and a foam brush to apply the white stars. He painted all of them for me (lucky girl, huh?).  I think he did a fantastic job, and that they truly resemble the star field on the flag!
While the star pot dried, my husband helped me out again by taping the rim of the medium sized pot so we could get red and white stripes across the top. We tried to tape off the entire pot, but the shape of it kept making the lines curve too much (which we didn’t like).  After about 20 minutes of trying to get it just right, I suggested just taping around the top and love the results!  Once it was taped, I simply sprayed on the Banner Red Krylon paint and gave it two even coats.  The tape and the paint worked beautifully…no runs!
The third tier (the smallest pot) was left solid blue.  I didn’t want the planter to look cluttered with another pattern.  You’ll notice there’s a fourth, red pot in the final picture below.  I’ll show you what I did with that little guy in a bit!

steps


After all the pots were painted, I applied two thin coats of polyurethane to seal and protect them.  Hopefully this step prolongs the life of the planter for a few years before I have to repaint!

Once everything was dry, I was finally ready to assemble the planter and plant the rest of my petunias!

We chose to put the planter on our back patio (again so we could enjoy it more since we spend most of our outside time in the backyard).  Luckily we had some leftover stack stone from a walkway project and set some in the bottom of the largest pot.  This helped to fill most of the lower part of the pot so we weren’t wasting potting soil.

assembly2

assembly

Next, pour some potting soil in the pot and put the medium sized pot on top.  You’ll secure this pot by packing soil tightly around the base.  Make sure to line the pot up to the back side of the largest pot.

assembly3

assembly4

Next, you guessed it, fill the medium sized pot with soil (you could put some stone in the bottom of this one as well if you want).  Repeat the same thing with the top (smallest) pot.  Once I had the medium sized pot where I wanted it, I started to assemble and plant at the same time.

assembly5

Soon, I had this beauty…

planter2

I’m thrilled with this planter project as well and have fittingly decided to call this one the…


I’m really happy that we figured out a good method for applying the stars because it really makes the entire planter if you ask me!

While creating this planter, I realized that I had one more pot left over and decided to stencil on a firework pattern that was also on the Martha Stewart stencil pack that I bought at Michael’s.  I found a home for it on our outdoor table…
tabletop


Since creating the Mad Planter and the Star Spangled Planter, my husband all of a sudden wants to put pots everywhere (and so do I)!  He’s suggested continuing to buy more to put in different spots around the yard and patio.  As I purchase, decorate, and create more planters, I’ll definitely share them with all of you!  I’m continuing to search Pinterest and some favorite blogs for new ideas.  If you have any you’d like to share, please do!

Please leave a comment, I love to hear from my readers! :)

I’ll be linking up again to several parties.  Come check them out!

the Grant Life

wednesday's wowzers

Too Much Time On My Hands

I Heart Nap Time

OrganizingHomelife.com

Debbie Does Creations

About Meredith Hazel

Meredith is a stay at home mom and has been blogging since 2012. She started Wait 'Til Your Father Gets Home as a creative outlet in between nap times for her little one. Wait 'Til Your Father gets home is a combination of crafting tutorials, DIY projects, recipes and, sharing some of life's journey along the way.

{the mad planter}

{the mad planter}

Let me just start by saying that this might be my most favorite project I’ve done since starting {Wait Til Your Father Gets Home}.  Since we moved into our house, my husband has made it his mission to completely yank out everything from our yard (front, back, sides, the whole-she-bang).  The yard we acquired was, to be blunt……a hot mess.  We pretty much have a blank canvas to work with now (which is so nice).  It’s fun to be able to plan out exactly what we want to put into our yard.  It would be even nicer if we could just do it all at once, but unfortunately flowers at Home Depot and Lowes are not free!

(Source of my Mad Planter inspiration)


I’ve been perusing Pinterest (as usual) and have come across some really cool planter ideas.  This one in particular caught my eye from Home Stories A-Z, so I did what I usually do when I find something I like on Pinterest….I showed my hubby.  I always expect him to tell me the things I show him are crazy, or silly, or girly, but he LOVED this concept.  He loved it even more when I suggested some red, white, and blue (I mentioned here, that we are quite the patriotic bunch in our household).


I decided to call it…

To make your own version, you’ll need:

  • 1-8″ clay pot
  • 6-6″ clay pots
  • Spray primer (primer in a paint can works just as well)
  • Spray Paint (I LOVE Krylon Indoor/Outdoor Paint in Banner Red and Navy Blue–both gloss finish)
  • Polyurethane Spray (you could use poly from a can as well)
  • 10 ft rebar (found at Lowe’s)
  • potting soil (had on hand)
  • annuals (of your choosing) We got two flats of petunias since the planter is smack in the middle of full sun for most of the day and had a LOT left over for a second planter project that I will share soon!
  • newspaper or tarp (had on hand)
This entire project cost about $45, plus we had a ton of flowers and soil left over for my second planter project that I hope to share by Friday!  The cost is a little more than I usually aim to spend on projects that I share on the blog, but I don’t mind because I have made something super unique and that we can use year after year.  Plus, we’ve gotten so many compliments from neighbors (and compliments are nice)!
To get started, spread out your newspaper or tarp and lay out all the clay pots.  Remove any stickers that may be on the pots and begin priming each pot.  I only had to apply one coat of the primer.
Once all the pots are primed and dry (it shouldn’t take too long to dry, especially if it’s 85 degrees outside like it is here in Georgia today), decide on the colors you’d like to incorporate and begin to spray paint.  As I mentioned, we decided on a red, white, and blue theme.  I think they’d look great with one color or even a stenciled pattern of some kind as well.  The possibilities are truly endless and completely up to you!
Since I didn’t have white spray paint, I just left two of the 6″ pots primed and didn’t apply color.  Don’t you just love the red and blue together?!  (FYI–I applied two coats of spray paint).
While the pots dry once again, decide where you want to put your Mad Planter (makes me smile every time I say that out loud).  We decided to put ours in our backyard since that’s where we hang out most of the time when we’re outside.  I swear, every time we’ve gone outside since putting the Mad Planter in, we comment on how much we love it.  My hubby was nice enough to hammer the rebar into the ground for me (I’m extremely handicapped when it comes to trying to use a tool…I need to fix that).  He thinks he put it about 2 feet into the ground, so a little wind won’t disturb our Mad Planter (I hope)!
Before you can begin assembling the Mad Planter, you’ll need to seal the pots with some polyurethane.  I used a fast drying, clear gloss poly made my Minwax.  Each coat completely dried in about 1 hour (again, it’s amazing what some hot Georgia sun can do for ya)!  I know it’s boring to wait around for paint to dry, but trust me, you need the polyurethane, otherwise the sun and rain will ruin your pots.  I’m hoping that this paint and sealing job will last us for a few summers before we need to sand and re-paint.  Here are all the pots after being painted and poly’ed…
Time for the assembly!
To assemble the Mad Planter, simply “string” the hole in the bottom of the pot (you know, the one for water to drip out of) onto the rebar, like so…
The 8″ pot is the base of the Mad Planter and should lay flat.  The rest of the pots are still “strung” through their water holes, but sit on the rim of the pot below, making each one look slanted.  We filled each pot with soil as we assembled the entire planter, and added some red & blue-ish petunias as well.  I am absolutely thrilled with the end result!
I LOVE the red, white, and blue-ness of the entire planter!  I also LOVE how it looks against our white picket fence!
What are your favorite annuals to plant each summer?  Do you have any fun planters that you’ve created and named after Alice and Wonderland characters?  Please leave a comment, I’d love to hear feedback from my readers!
I’ll be linking up with these fabulous parties…

Making

Skip To My Lou

Keeping It Simple

OrganizingHomelife.com

Tip Junkie handmade projects

Today's Creative Blog

wednesday's wowzers


The Taylor House

the Grant Life

Weekend Bloggy Reading


Photobucket

I Heart Nap Time


Photobucket


Pin It & Win It @ Cheap Crafty Mama

Freedom Fridays

Related Posts Plugin for WordPress, Blogger...

About Meredith Hazel

Meredith is a stay at home mom and has been blogging since 2012. She started Wait 'Til Your Father Gets Home as a creative outlet in between nap times for her little one. Wait 'Til Your Father gets home is a combination of crafting tutorials, DIY projects, recipes and, sharing some of life's journey along the way.