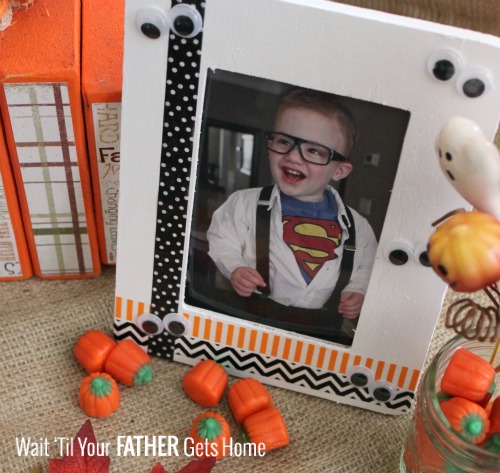
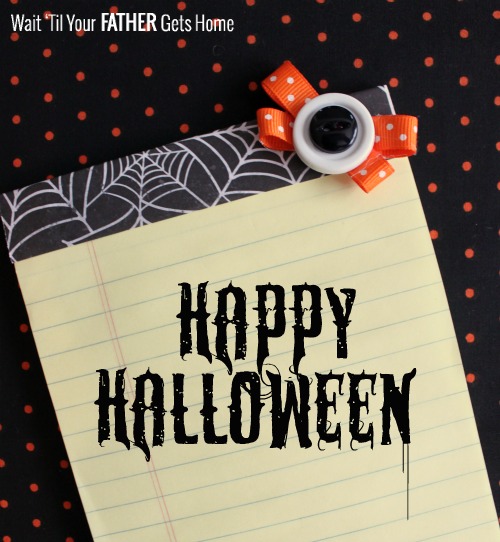
{Half Beaded Bracelet: Guest Post One Artsy Mama}

I got back from SNAP! yesterday and my good friend Amy has so graciously put together a fun bracelet tutorial for all of you to give me a day or two to recover from the trip back home!  Enjoy!
Hi there, Meredith’s friends and followers!  If we haven’t “met” yet, let me introduce myself!  I’m Amy, aka One Artsy Mama.  I’m a wife, a mama, a ballroom and latin dancer, an artist, a follower of Jesus, and a Starbucks addict.  Today, I’m happy to be here to share with you one of my most recent projects.  Actually, truth be told, I’m a little jealous too, because I would have loved to be at SNAP! with Meredith instead of at home filling in for her while she’s gone.  But alas…on to the project.
Besides all the things I listed above, one of the other things friends will tell you about me is that I’m a fashion junkie.  I love reading the latest issues of Lucky, InStyle, Style Watch, and other fashion-related magazines and trying out some of the latest trends.  One of the things I’ve noticed recently is that while beaded bracelets will certainly never go entirely out of style, there’s a new twist on the old standard…a half-beaded bracelet.  Basically, the top part is composed of some pretty {and often delicate} beads, and the rest is made from chain, leather, or some other material for contrast.  I decided that instead of paying top dollar for one, I could make my own {and so can you}!
Here’s how I did it:
Materials:
-  5-9 beads of your choice, depending on the size of the beads and your wrist
- stringing wire
- two crimp beads
- four jump rings
- clasp
- chain
- wire cutters, needle nose and flat nose pliers, crimp tool {optional}
First, let’s talk about the beads.  I saw mine at the Potomac Bead Company on my last visit there and had to have them.  The iridescence caught my eye right away and I knew they’d make some pretty statement pieces.  I found some similar ones on Etsy…the only difference is that they’re not opaque, but they’d look very much the same if you like the particular beads I used.

Step 1: Cut a 6″ piece of stringing wire.  Place one end through a crimp bead and a jump ring. Thread the wire back down through the same crimp bead.  Tighten by using your crimp tool, or {if you don’t have one} squeezing the bead flat with your pliers.

Step 2: String your beads onto the wire.  I think an odd number looks best.  I chose to use 7 beads, which makes the beaded part almost as wide as the top of my wrist but not quite.

Step 3: Place a crimp bead and jump ring on the wire at the other end of your beads.  Thread the wire back down through the crimp bead as well as the closest two beads.  Tighten the crimp bead, then cut the wire and hide it by tucking it down into the beads.

Step 4: Attach small pieces of chain to the jump rings on either end.  This is a great use for scrap chain you have from other projects!  You may want to measure your wrist first so you know how long you want each side to be.

 Step 5: Add a jump ring and clasp to one chain, and a large jump ring to the other.  Hook clasp in ring to close.

That’s all there is to it!

Enjoy your new bracelet!  If you enjoyed this tutorial, I’d love for you to stop by One Artsy Mama sometime and check out some of the other jewelry I’ve created, as well as kids’ crafts, home decor, and more!  Right now, I’m also giving away a free e-book, Crochet 101 to help beginners get started with a new hobby!
Thanks, Meredith, for letting me stop by today…hope you had fun at SNAP! {I really do, even though I’m turning as green as Kermit the Frog!}
Hugs & Glitter,

About Meredith Hazel

Meredith is a stay at home mom and has been blogging since 2012. She started Wait 'Til Your Father Gets Home as a creative outlet in between nap times for her little one. Wait 'Til Your Father gets home is a combination of crafting tutorials, DIY projects, recipes and, sharing some of life's journey along the way.

{Spring Inspired Post-It Holder}

{Spring Inspired Post-It Holder}

Today, on this first day of Spring,  I wanted to share a fun and simple Spring craft that you could easily make in under 10 minutes.  The best part?  If you’ve got a little one that enjoys crafting with you, he or she would love to work on this project too.

I’m such a sucker for jotting down lists or reminders on Post-Its.  I thought it would be nice to have a cute holder in my kitchen desk area to brighten it up a bit, and make things look a little more “Spring-y.”

Spring Inspired Post It Holders @ Wait Til Your Father Gets Home, perfect way to brighten up your office! #Spring #postits #crafts

To make a Post-It Holder, you’ll need:

plastic 5 x 7 frames {the kind that have the little stand on the bottom}

Post-It pads in a variety of colors

pretty scrapbook papers

hot glue gun/glue sticks

Spring inspired felt stickers {found mine at Hobby Lobby and of course used coupons}

mini clothespins

paper cutter

Spring Inspired Post It Holders @ Wait Til Your Father Gets Home, perfect way to brighten up your office! #Spring #postits #crafts

To get started, use your paper cutter to measure and cut 5 x 7 pieces of your desired scrapbook papers.  I chose two patterns that screamed “Spring” to me.

paper

After inserting the papers into each frame, I chose a Post-It pad that I felt went well with each paper, hot glued the entire back side of it to the holder, and added a few cute felt stickers.

Spring Inspired Post It Holders @ Wait Til Your Father Gets Home, perfect way to brighten up your office! #Spring #postits #crafts

I added a mini clothespin to the second one I made, just to have another spot to hold a reminder or two if needed!

Spring Inspired Post It Holders @ Wait Til Your Father Gets Home, perfect way to brighten up your office! #Spring #postits #crafts

The best part?!  You could totally change these up for each season or holiday AND they’d make such a cute gift for a neighbor or teacher.

Enjoy your day!

wtyfgh-signature

I’ll be linking up at these parties.

About Meredith Hazel

Meredith is a stay at home mom and has been blogging since 2012. She started Wait 'Til Your Father Gets Home as a creative outlet in between nap times for her little one. Wait 'Til Your Father gets home is a combination of crafting tutorials, DIY projects, recipes and, sharing some of life's journey along the way.

{Stamped Eggs}

{Stamped Eggs}

In case you missed my post on Tatertots & Jello this month for my Stamped Easter Eggs, here it is again!

Spring fever is in the air, even if a lot of parts of the country are still getting random {or sometimes not so random} winter storms.  We actually had a little snow last week in Georgia, to be immediately followed by a 70 degree weekend!  Well, I’m ready for Spring, and that means so is my decor.  I love to change little nooks in my house according to the season or holiday.  It’s so nice to change things up a bit every now and then, don’t you think?

Since Easter falls earlier this year, I’ve been in Easter Egg mode lately.  I wanted to try out some hand stamped eggs for a few spots in my house, and soon came up with these pretties…

Stamped Eggs @WTYFGH

To make your own

Stamped Eggs

you’ll need:

wooden eggs {found at Hobby Lobby}

spray paint {mine is Krylon Satin finish in Ivory}

cute stencils

black acrylic paint

foam brush

materials

I had an extra large egg crate in my fridge with only a few lonely eggs left, so I emptied it out and used it to set the wooden eggs inside, to create an easy surface to spray paint.

easy painting

Of course, once the tops of the eggs had a few thin coats, I had to flip the eggs over to cover the surface of the bottom half of each egg.  It really didn’t take too long, as I chose a nice sunny day to do my spray painting.

*Remember, when spray painting, thin coats are best!

painted eggs

The ivory spray paint gave the eggs a slight sheen and dulled them up a bit from the bright white that they once were.  If you’d prefer bright white eggs, you could skip the spray painting part.

Once the eggs were dry, I got to the fun part, choosing random numbers and letters to stamp onto each egg.

painting process

I used a couple small pieces of washi tape {since it’s so easy to remove and reapply}, put a small amount of black acrylic paint on my foam brush, and dabbed the paint onto the stencil.  Definitely do not use a large amount of paint as you want it to look like it was lightly sponged on.  Remove the stencil immediately and admire your handy work!

As I finished, I carefully put them back into the egg carton to dry.

eggs

I used these stamped eggs in a few spots around me house.  I’ve had a bit of an obsession with Spanish moss this month, and added a handful of my newly stamped eggs to a vase filled with moss.

stamped eggs in moss

I also added a couple eggs to a taller, skinnier vase in the same vignette…

tablescape

We’ve got a tall, square table in our kitchen that sometimes my husband I like to sit at when our little guy is sleeping.  Lately, I’ve been dressing up the tabletop, so we’ve got a little decor to brighten the dark brown table.  And, luckily, my son can’t reach up to this table and mess up the tablescape {yet!}.

I also added some stamped eggs to a pretty candy dish that used to be my aunt’s with some more Spanish moss.

Stamped Eggs1

I’m loving the simplicity of the eggs with the brightness of the moss.

What about you?!  Have you created any egg inspired crafts or decor yet this month?  I’d LOVE to see what you’ve come up with!

wtyfgh-signature

Linkin’ up at these parties!

About Meredith Hazel

Meredith is a stay at home mom and has been blogging since 2012. She started Wait 'Til Your Father Gets Home as a creative outlet in between nap times for her little one. Wait 'Til Your Father gets home is a combination of crafting tutorials, DIY projects, recipes and, sharing some of life's journey along the way.

{Easter Egg Garland & Mantel}

{Easter Egg Garland & Mantel}

Spring is definitely in the air, and we got a nice hint of it this past weekend in Georgia!  With a new season approaching, I’ve been changing a lot of the decor in my house to get us all in a fresh, Springtime mood.  When I saw these cute Easter egg ornaments at Hobby Lobby a few weeks ago, I knew they’d be perfect for an Easter Egg Garland for my Spring Mantel!

Easter Egg Garland

To make

Easter Egg Garland

you’ll need:

Easter Egg Ornaments {found at Hobby Lobby}

jute twine

burlap scraps

supplies

I know there are some other items pictured in the supplies photo, but I ended up not using a few of them.  I’m sure they’ll be used soon!

To get started, I put up the length of jute twine that I needed on my mantel for my garland.  I like to hang the garland high enough that my little, climbing toddler can’t reach it.

hang twine

To attach the jute twine, I tied it around some vases on top of the mantel.  This is typically how I attach any kind of garland I make.

I then began attaching each egg ornament by tying it on with a small piece of jute twine.

prep eggs

tie on

Soon, I had an entire garland full of colorful Easter Eggs.  In between every few eggs, I also tied on a scrap piece of burlap to give the garland some more texture.

Easter Egg Garland @ WTYFGH

I love the pop of color that the eggs add to the mantel {and the fact that it can stay up through the end of the month for Easter}.  To the top of the mantel, I added some bright green and purple floral stems and picks to some tall vases and my twine wrapped bottles.

vases

I also tied on a scrap piece of muslin from my stash.  I’m loving the imperfect-ness of the bows.

vases2

The other side of the mantel holds a tall hurricane vase with our wine cork collection and some yarn wrapped Easter eggs purchased a few years back.

easter mantel

My mantels are typically simple, but that’s what I love about them.  Spring is all about simplicity after all!

How have you decorated for Spring or Easter so far?

wtyfgh-signature

I’ll be linking up at these parties!

About Meredith Hazel

Meredith is a stay at home mom and has been blogging since 2012. She started Wait 'Til Your Father Gets Home as a creative outlet in between nap times for her little one. Wait 'Til Your Father gets home is a combination of crafting tutorials, DIY projects, recipes and, sharing some of life's journey along the way.

{Simple Bobby Pins}

{Simple Bobby Pins}

I had some free time a few weeks ago, yes I said weeks ago to take a solo trip to Hobby Lobby.  It’s funny how much stuff you can find when you aren’t wrangling a toddler and trying to keep him from opening packages of plastic Easter eggs, or m & m’s, or honestly anything and everything else in sight!

While walking the aisles, I finally cam across something that I had been wanting to work with for a while now, some silver bobby pins that you could add little adornments to.  I also found some super cute mini fabric rosettes and gems that would make a perfect little topper for each bobby pin.

Simple Bobby Pins by WTYFGH

Simple Bobby Pins

To make some of your own, you’ll need:

bobby pins with a flat, circular head at the top {found in the jewelry aisle}

small items to decorate them with {buttons, fabric, poms, flowers}

hot glue gun/glue sticks

materials

Not much to explain here friends.  Get your glue gun plugged in, put a dab of glue on each circular head and attach your desired bling.  Soon I had a handful of simple little bobby pins in less than 5 minutes!

Simple Bobby Pins

I went with black and white options this time around, but I think next time I’m at the craft store I’ll find a fun Spring color or two to use!

simple bobby pins2

You really can’t go wrong with black, white, and silver options though!

Don’t forget to enter to win one of two $175 gift cards to celebrate Wait ‘Til Your Father Gets Home & Chase the Star’s Blogiversaries this week!  You could win $175 to Target or Amazon just by entering here.  GOOD LUCK to all of you!

Blogiversary Banner

wtyfgh-signature

I’ll be linking up here.

Related Posts Plugin for WordPress, Blogger...

About Meredith Hazel

Meredith is a stay at home mom and has been blogging since 2012. She started Wait 'Til Your Father Gets Home as a creative outlet in between nap times for her little one. Wait 'Til Your Father gets home is a combination of crafting tutorials, DIY projects, recipes and, sharing some of life's journey along the way.